巻物プレゼン
7/22 に JJUG のナイトセミナ Inside Lambda で「Project Lambda の基礎」というタイトルでプレゼンをしてきました。
内容は SlideShare で見てもらうとして、今回は私は前座で、とりは宮川さんの Lambda の内部構造。なので、今回はちょっと遊ばせてもらいました。
何を遊んだかというと、プレゼンの資料です ^ ^;;
この講演の前に、映画の Short Peace で大友克洋が巻物風のアニメーションをやっているということをテレビで見たのです。絵コンテも巻物ということで、すごい横長。これはおもしろいなぁと思ったわけです。
で、プレゼンでもやってみたくなってしまったわけです、巻物を。
でも、さすがに下の絵のように左から右へと動くわけにはいきません。というのも、そうすると縦書きにしなくては行けないからです。
かといって、上から下に動かすと巻物というより、掛け軸かすだれみたいになってしまいます。
ということで、下から上に動かすようにしてみました。
動きが決まったら、それをどうやって JavaFX で実現させるかです。
いちおう、3D でほんとに巻物を実現することも考えたのですが、すぐに止めました >< だって、そんなアニメーション作るの大変なんだもん。
では、どうやったかというと、簡単です。
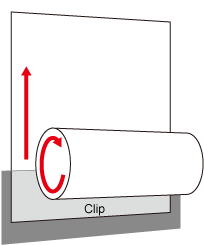
手前に円筒を配置して、紙送りするときには、円筒を回転させるアニメーションをさせます。そして、円筒の後ろに平面のノードを配置して、円筒の回転と一緒に上に移動させるアニメーションを行います。
ただし、それだけだと円筒よりも下の部分が見えてしまって、円筒とノードが別々だということが分かってしまうので、円筒の中心より下は見えないようにクリッピングしてしまいます。
絵で描くと、こんな感じ。
ちなみに、下に配置するノードはほんとの巻物ではないので、長くする必要はないです。その代わりに、紙送りをするときに、今表示しているノードと次に表示するノードをピッタリくっつけて、移動させます。
では、これを JavaFX で書いてみます。
まず、円筒。JavaFX 8 だと、円筒やキューブのようなプリミティブな 3D のオブジェクトを表すクラスが追加されています。
円筒は javafx.scene.shape.Cylinder クラスです。
Cylinder クラスをそのまま描画させると円筒が立って表示されます。そのため、回転を行って水平方向に表示させたいのです。ところが、アニメーションで RotateTransition クラスを使いたいため、回転に rotate プロパティは使えません。というのも RotateTransition クラスが行うアニメーションは rotate プロパティを使用して回転を行わせているからです。
そのため、javafx.scene.transfom.Rotate クラスを使用して、回転を表現し、それをノードにセットするようにしました。
また、画面下方に表示させるために移動も行うのですが、アニメーションでは回転のみなので、こちらは setTranslateX/setTranslateY メソッドで行っています。
なお、ここでは表示サイズを 1024x768 と想定して記述しています。
        cylinder = new Cylinder(40, 1000.0);
        Rotate rotate = Transform.rotate(90, 0, 0);
        cylinder.getTransforms().add(rotate);
        cylinder.setTranslateX(510);
cylinder.setTranslateY(740);これをシーングラフに追加すればいいのですが、これだけだと円筒のようには見えません。というのも、JavaFX のデフォルトでは平行投影されているため、円筒が傾いていない限り、単なる四角に見えてしまうためです。
ちゃんと円筒のように膨らみを持たせるには、一点透視にする必要があります。これを行っているのが javafx.scene.Camera クラスです。
Camera クラスのサブクラスには平行投影する ParallelCamera クラスと、一点透視を行う PerspectiveCamera クラスがあります。デフォルトでは ParallelCamera クラスが使われているので、PerspectiveCamera クラスに切り替えます。
        Scene scene = new Scene(root, constants.getWidth(), constants.getHeight());
        scene.setCamera(new PerspectiveCamera());
さて、ここまでで実行してみます。
ちゃんと円筒と分かりますね。しかし、白い円筒ではちょっとあじけない。
そこで、テクスチャーマッピングという手法を使用します。簡単にいえば、イメージを描画オブジェクトの表面に貼ってしまうと手法です。
適当にフリーのイメージで巻物っぽい絵を探してきて、それを貼ってみました。
        PhongMaterial mat = new PhongMaterial();
        Image diffuseMap = new Image(getClass().getResource("images.jpg").toString());
        mat.setDiffuseMap(diffuseMap);
cylinder.setMaterial(mat);テクスチャーマッピングで貼るものは javafx.scene.paint.PhongMaterial クラスで表します。そこにイメージをセットして、Cylinder オブジェクトに setMatrial メソッドでセットします。
これでテクスチャーマッピングのできあがりです。実行してみると、こんな感じ。
それっぽくなってきました。
後は後ろにノードを配置させて動かすだけです。これは今までのプレゼンツールの機能を使っています。
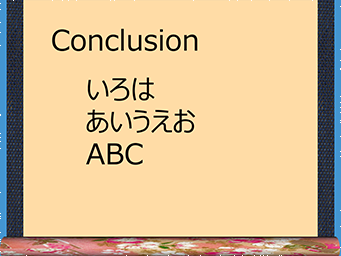
ナイトセミナでは SVG を使ったのですが、ここでは FXML で書いてます。単に上に動かすアニメーションです。
そして、それと同時に円筒もアニメーションさせます。
でも、ただ円筒を回転させるのもつまらないし、いくらたっても減らない魔法の円筒になってしまいます。そこで、回転するアニメーションと一緒に、円筒の半径を減らしていくというアニメーションを同時に行っています。
また、半径が減れば、同じ量の紙送りするにはより回転させる必要があるので、回転量もだんだんと増えるようにしてみました。
    public void roll() {
        angle *= 1.1;

        RotateTransition trans = new RotateTransition(Duration.millis(2_000));
        trans.setAxis(new Point3D(1.0, 0.0, 0.0));
        trans.setNode(cylinder);
        trans.setByAngle(angle);
        trans.setInterpolator(Interpolator.LINEAR);
        trans.play();

        Timeline timeline = new Timeline(
            new KeyFrame(Duration.millis(2_000),
                         new KeyValue(cylinder.radiusProperty(), cylinder.getRadius()*.95))
        );
        timeline.play();
    }
ParallelTransition クラスは使っていないのですが、一緒に動かせばだいたい同時にアニメーションしてくれます。そんなに厳密なものではないので、これで十分。
忘れてましたけど、デフォルトだと回転軸は z 軸方向になっているので、これを x 軸方向にしておいてやる必要があります。
という部分をプレゼンツールにくっつけて、プレゼンしたのでした。
ただ、今までは 1 枚のページの手前になにか表示するという発想がなかったので、やっつけ感あふれる実装になっています。
もし、今後もこういうようにページの手前に表示する必要が出てきたら、ちゃんとした実装にします ^ ^;;;
ここで使ったものは GitHub にアップしてあります。いつも使っているプレゼンツールのサブセットだと思ってください。
makimono
https://github.com/skrb/makimono
Duke 007
もうずいぶん前のことなのですが、Java Day Tokyo 2013 の Java the Night でデモをしてきました。
何をデモしたかというと、いつもプレゼンテーションで使用している JavaFX のプレゼンテーションツール Caribe。
Caraibe 自体は自分がプレゼンでやりたいことができるように、自由度をかなり上げていて、普通の人が使うのはかなりつらいと思うので、単体では公開していないのです。でも、プレゼンごと GitHub にアップ してあったりするので、そちらを見ていただければと思います。
で、今日はそのオープニングで作ったアニメーションについて。
去年は Star Wars のアニメーション作ったので、今年は 007 です。
Java the Night の音なしバージョンは YouTube にアップしてあるので、そのはじめの部分を見ていただければ分かるはず。
この 007 風 Duke のアニメーションについてどうやって作ったか、解説していきます。
なお、今回のアニメーションだけとりだしたバージョンを GitHub で公開しているので、そちらも参照していただければと思います。
なお、今回は NetBeans ではなく、IntelliJ IDEA を使用しています。NetBeans の Java SE 8 対応は 7.4 からになると思うのですが、現在は Nightly Build しか公開されていません。
この Nightly Build がほんとうにダメダメ。ビルドが進めば進むほど安定度が悪くなるってどういうこと? 6/30 の段階では、Java SE 8 はなんとか使えても、JavaFX 8 は全然使えなくなってしまいました ><
ということで、はじめての IntelliJ IDEA のプロジェクトでした。
全体構成
いつものように絵は Illustrator で描いて、SVG に変換してあります。
アニメーションしたいパーツごとに、レイヤーを分けてあります。こんな感じ。
それを自作の SVGLoader で読み込んでいます。たとえば、背景の黒を読み込んでいる部分はこんな感じ。
        svgContent = SVGLoader.load(getClass().getResource(SVG_FILE).toString());

        Node background = svgContent.getNode("background");
        root.getChildren().add(background);
ただし、一番始めの円だけは単純なので、コードで書いています。
アニメーションさせるノード群がそろったら、アニメーションのコードを書いていきます。
ここでは全部 Timeline を使って書いてます。メインのタイムラインを SequentialTransition で書いてもいいのですが、ちょっと複雑なことをやろうとすると、SequentialTransition は結構めんどうくさいんですよね。
Java the Night のためにこれを作るときは、時間があまりなかったので、Timeline に直書きしています。より柔軟にやるには以前 複雑なアニメーション で書いたように、メインのタイムラインと、子アニメーションの構成で書く方が柔軟性が高いです。
さて、全体の流れはこんな感じです。
        Timeline timeline = new Timeline(
                new KeyFrame(Duration.ZERO,
                        new KeyValue(propertyX, initX),
                        new KeyValue(propertyY, initY)),
                new KeyFrame(Duration.millis(  500),
                        new KeyValue(propertyX, nextX),
                        new KeyValue(propertyY, nextY)),

            <<省略>>

        );

        timeline.play();
では、部分のアニメーションについて見ていきます。
円のアニメーション
一番始めは、2 つの円がアニメーションする部分です。1 つの円が等速運動していて、もう 1 つの円が等速運動している円に追いついていくような感じ。
2 つ目の円は実際には一定期間同じ場所にいて、一瞬で移動、再び一定期間同じ場所というのを繰り返しています。
普通に Timeline - KeyFrame - KeyValue で書いてしまうとずっと移動してしまうので、工夫が必要です。たとえば...
        Circle circle1 = new Circle(-100.0, 384.0, 50.0);
        circle1.setFill(Color.WHITE);
        root.getChildren().add(circle1);

        Circle circle2 = new Circle(-100.0, 384.0, 50.0);
        circle2.setFill(Color.WHITE);
        root.getChildren().add(circle2);

        Timeline timeline = new Timeline(
                new KeyFrame(Duration.ZERO,
                        new KeyValue(circle1.translateXProperty(), 0.0),
                        new KeyValue(circle2.translateXProperty(), 0.0)),
                // 490ms まで同じ場所に留めて、500ms までの 10ms で移動
                new KeyFrame(Duration.millis(  490),
                        new KeyValue(circle2.translateXProperty(), 0.0)),
                new KeyFrame(Duration.millis(  500),
                        new KeyValue(circle1.translateXProperty(), 200.0),
                        new KeyValue(circle2.translateXProperty(), 200.0)),
                // 990ms まで同じ場所に留めて、1000ms までの 10ms で移動
                new KeyFrame(Duration.millis(  990),
                        new KeyValue(circle2.translateXProperty(), 200.0)),
                new KeyFrame(Duration.millis(1_000),
                        new KeyValue(circle1.translateXProperty(), 400.0),
                        new KeyValue(circle2.translateXProperty(), 400.0)),
何をやっているかというと、500ms ごとに移動をさせているのですが、その 10ms 前まで同じ位置にいるということをわざと書いています。
一方は 500 ミリ秒までの間等速で移動していますが、一方は 0 から 490ms まで同じ位置、490ms から 500ms で移動ということを繰り返しているわけです。
これでもうまくいくのですが、10ms 前の場所を書かなくてはいけないのがちょっと...
そこで、使うのが Interpolator です。
えっ、Interpolator はイージングの時使うんだけじゃないの、と思われるかもしれません。でも、Interpolator には DISCRETE というのがあるのです。
DISCRETE は離散という意味です。つまりパラパラマンガを作るときに使います。ぎりぎりまで同じ場所で、次に違う場所というのは、パラパラマンガと同じなわけですね。
で上の Timeline がこうなりました。
        Timeline timeline = new Timeline(
            new KeyFrame(Duration.ZERO,
                         new KeyValue(circle1.translateXProperty(), 0.0),
                        new KeyValue(circle2.translateXProperty(), 0.0)),
            new KeyFrame(Duration.millis(  500),
                        new KeyValue(circle1.translateXProperty(), 200.0),
                        new KeyValue(circle2.translateXProperty(), 200.0,
                                     Interpolator.DISCRETE)),
            new KeyFrame(Duration.millis(1_000),
                        new KeyValue(circle1.translateXProperty(), 400.0),
                        new KeyValue(circle2.translateXProperty(), 400.0,
                                     Interpolator.DISCRETE)),
Transition の場合は setInterpolator メソッドを使用しますが、Timeline の場合は KeyValue で Interpolator を指定します。
つまり KeyFrame ごとに補間方法を変化させられるわけです。
これで、追いかけっこする円ができました。
歩くDuke
次は銃身の穴と一緒に歩く Duke です。実をいうと、この部分は Java the Night に間に合わなくて、やらなかったんです ^ ^;;
歩くアニメーションは足踏みをするパラパラマンガと、移動のアニメーションを組み合わせて行ないます。足踏みの方は繰り返しアニメーションしておきます。
Duke は手が短いので、足だけ動いている絵をまず用意しました。ここでは、5 枚の絵でアニメーションさせています。
移動は、全体の Timeline で一緒に行なっているのですが、足踏みだけは別の Timeline で表してます。
    private Animation prepareWalking(Group root) {
        walkingDuke = new Group();

        // 足踏みしているイメージを読み込み、
        // 透明にしておく
        for (int index = 0; index < 5; index++) {
            Node duke = svgContent.getNode(String.format("walk%02d", index));
            duke.setOpacity(0.0);
            walkingDuke.getChildren().add(duke);
        }

        Timeline walkingAnimation = new Timeline();

        // 一定時間ごとに、透明度を変化させて、表示させるイメージを切り替える
        KeyFrame keyFrame0 = new KeyFrame(Duration.millis(0),
                new KeyValue(walkingDuke.getChildren().get(0).opacityProperty(),
                             1.0,
                             Interpolator.DISCRETE),
                new KeyValue(walkingDuke.getChildren().get(4).opacityProperty(),
                             0.0,
                             Interpolator.DISCRETE));
        walkingAnimation.getKeyFrames().add(keyFrame0);

        for (int i = 1; i < 5; i++) {
            KeyFrame keyFrame = new KeyFrame(Duration.millis(200*i),
                new KeyValue(walkingDuke.getChildren().get(i).opacityProperty(),
                             1.0,
                             Interpolator.DISCRETE),
                new KeyValue(walkingDuke.getChildren().get(i-1).opacityProperty(),
                             0.0,
                             Interpolator.DISCRETE));
            walkingAnimation.getKeyFrames().add(keyFrame);
        }

        // 無限に繰り返し
        walkingAnimation.setCycleCount(Timeline.INDEFINITE);

        return walkingAnimation;
    }
足踏みのパラパラマンガは、一定時間ごとにイメージを切り替えることで実現します。ここではイメージの切り替えに透明度を変化させることで行ないました。
もちろん、Interpolator は DISCRETE です。
そして、setCycleCount メソッドの引数に INDEFINITE を指定することで、無限回アニメーションさせています。
さて、移動の方です。そちらは前述したように、メインの Timeline でやってます。なので、先ほどの続きから。
                new KeyFrame(Duration.millis(3_000),
                        e -> {
                            // コンテナにこれから移動させるノードを追加
                            root.getChildren().add(barrelHole);
                            root.getChildren().add(walkingDuke);
                            root.getChildren().add(duke);
                            root.getChildren().add(riffle);
                            root.getChildren().add(blood);

                            // 足踏みアニメーションをスタート
                            walkingAnimation.play();
                        },
                        new KeyValue(circle1.translateXProperty(), 1200.0),
                        new KeyValue(circle2.translateXProperty(), 1200.0, Interpolator.DISCRETE),
                        new KeyValue(barrelHole.translateXProperty(), 1400.0),
                        new KeyValue(walkingDuke.translateXProperty(), 1400.0),
                        new KeyValue(riffle.translateXProperty(), 1400.0)),
                new KeyFrame(Duration.millis(7_000),
                        e -> {
                            // 足踏みアニメーションをストップ
                            walkingAnimation.stop();
                        },
                        // 足踏みしている横向きのDukeを非表示にする
                        new KeyValue(walkingDuke.opacityProperty(), 0.0, Interpolator.DISCRETE),
                        new KeyValue(duke.opacityProperty(), 1.0, Interpolator.DISCRETE),
                        new KeyValue(barrelHole.translateXProperty(), 0.0),
                        new KeyValue(walkingDuke.translateXProperty(), 0.0),
                        new KeyValue(riffle.translateXProperty(), 0.0)),
e -> { ... } の部分は Lambda 式で、もともとは EventHandler を表してます。KeyFrame が指定している時間に行なう処理を記述します。
ここでは、3 秒の時にこれから移動する要素をコンテナに追加し、7 秒の時に無限に続く足踏みアニメーションを停止させています。
さて、残りは移動のアニメーションだけで構成されているので、たいしたことないです。
最後にとりあえず、コード載せておきます。なんか、Timeline すごいことになってますねww
package net.javainthebox.dukeanimation;

import com.sun.scenario.animation.shared.ClipInterpolator;
import javafx.animation.Animation;
import javafx.animation.Interpolator;
import javafx.animation.KeyFrame;
import javafx.animation.KeyValue;
import javafx.animation.Timeline;
import javafx.application.Application;
import javafx.event.ActionEvent;
import javafx.event.EventHandler;
import javafx.scene.Group;
import javafx.scene.Node;
import javafx.scene.Scene;
import javafx.scene.media.AudioClip;
import javafx.scene.paint.Color;
import javafx.scene.shape.Circle;
import javafx.stage.Stage;
import javafx.util.Duration;
import net.javainthebox.caraibe.svg.SVGContent;
import net.javainthebox.caraibe.svg.SVGLoader;

public class Duke007 extends Application {
    private final static String SVG_FILE = "duke007.svg";

    private SVGContent svgContent;
    private Group walkingDuke;

    @Override
    public void start(Stage stage) {
        Group root = new Group();

        svgContent = SVGLoader.load(getClass().getResource(SVG_FILE).toString());

        Node background = svgContent.getNode("background");
        root.getChildren().add(background);

        starAnimation(root);

        Scene scene = new Scene(root, 1024, 768);
        stage.setScene(scene);
        stage.show();
    }

    private void starAnimation(Group root) {
        Circle circle1 = new Circle(-100.0, 384.0, 50.0);
        circle1.setFill(Color.WHITE);
        root.getChildren().add(circle1);

        Circle circle2 = new Circle(-100.0, 384.0, 50.0);
        circle2.setFill(Color.WHITE);
        root.getChildren().add(circle2);

        Node barrelHole = svgContent.getNode("barrelhole");
        Node duke = svgContent.getNode("dukestand");
        duke.setOpacity(0.0);
        Node riffle = svgContent.getNode("riffle");
        Node blood = svgContent.getNode("blood");

        Animation walkingAnimation = prepareWalking(root);

        Timeline timeline = new Timeline(
                new KeyFrame(Duration.millis(  500),
                        new KeyValue(circle1.translateXProperty(), 200.0),
                        new KeyValue(circle2.translateXProperty(), 200.0, Interpolator.DISCRETE)),
                new KeyFrame(Duration.millis(1_000),
                        new KeyValue(circle1.translateXProperty(), 400.0),
                        new KeyValue(circle2.translateXProperty(), 400.0, Interpolator.DISCRETE)),
                new KeyFrame(Duration.millis(1_500),
                        new KeyValue(circle1.translateXProperty(), 600.0),
                        new KeyValue(circle2.translateXProperty(), 600.0, Interpolator.DISCRETE)),
                new KeyFrame(Duration.millis(2_000),
                        new KeyValue(circle1.translateXProperty(), 800.0),
                        new KeyValue(circle2.translateXProperty(), 800.0, Interpolator.DISCRETE)),
                new KeyFrame(Duration.millis(2_500),
                        new KeyValue(circle1.translateXProperty(), 1000.0),
                        new KeyValue(circle2.translateXProperty(), 1000.0, Interpolator.DISCRETE)),
                new KeyFrame(Duration.millis(3_000),
                        e -> {
                            root.getChildren().add(barrelHole);
                            root.getChildren().add(walkingDuke);
                            root.getChildren().add(duke);
                            root.getChildren().add(riffle);
                            root.getChildren().add(blood);

                            walkingAnimation.play();
                        },
                        new KeyValue(circle1.translateXProperty(), 1200.0),
                        new KeyValue(circle2.translateXProperty(), 1200.0, Interpolator.DISCRETE),
                        new KeyValue(barrelHole.translateXProperty(), 1400.0),
                        new KeyValue(walkingDuke.translateXProperty(), 1400.0),
                        new KeyValue(riffle.translateXProperty(), 1400.0)),
                new KeyFrame(Duration.millis(7_000),
                        e -> {
                            walkingAnimation.stop();
                        },
                        new KeyValue(walkingDuke.opacityProperty(), 0.0, Interpolator.DISCRETE),
                        new KeyValue(duke.opacityProperty(), 1.0, Interpolator.DISCRETE),
                        new KeyValue(barrelHole.translateXProperty(), 0.0),
                        new KeyValue(walkingDuke.translateXProperty(), 0.0),
                        new KeyValue(riffle.translateXProperty(), 0.0)),
                new KeyFrame(Duration.millis(7_500),
                        e -> {
                            AudioClip clip = new AudioClip(getClass().getResource("OMT004_02S005.wav").toString());
                            clip.play();
                        }),
                new KeyFrame(Duration.millis(8_000),
                        new KeyValue(barrelHole.translateXProperty(), 0.0),
                        new KeyValue(barrelHole.translateYProperty(), 0.0),
                        new KeyValue(riffle.translateXProperty(), 0.0),
                        new KeyValue(riffle.translateYProperty(), 0.0),
                        new KeyValue(blood.translateYProperty(), 0.0)),
                new KeyFrame(Duration.millis(9_000),
                        new KeyValue(barrelHole.translateXProperty(), -200.0),
                        new KeyValue(barrelHole.translateYProperty(), 100.0),
                        new KeyValue(riffle.translateXProperty(), -200.0),
                        new KeyValue(riffle.translateYProperty(), 100.0)),
                new KeyFrame(Duration.millis(10_000),
                        new KeyValue(barrelHole.translateXProperty(), -100.0),
                        new KeyValue(barrelHole.translateYProperty(), 200.0),
                        new KeyValue(riffle.translateXProperty(), -100.0),
                        new KeyValue(riffle.translateYProperty(), 200.0)),
                new KeyFrame(Duration.millis(11_000),
                        new KeyValue(barrelHole.translateXProperty(), 100.0),
                        new KeyValue(barrelHole.translateYProperty(), 400.0),
                        new KeyValue(riffle.translateXProperty(), 100.0),
                        new KeyValue(riffle.translateYProperty(), 400.0)),
                new KeyFrame(Duration.millis(12_000),
                        new KeyValue(barrelHole.translateXProperty(), 0.0),
                        new KeyValue(barrelHole.translateYProperty(), 900.0),
                        new KeyValue(riffle.translateXProperty(), 0.0),
                        new KeyValue(riffle.translateYProperty(), 900.0)),
                new KeyFrame(Duration.millis(15_000),
                        new KeyValue(blood.translateYProperty(), 1700.0))
        );

        timeline.play();
    }

    private Animation prepareWalking(Group root) {
        walkingDuke = new Group();

        // 足踏みしているイメージを読み込み、
        // 透明にしておく
        for (int index = 0; index < 5; index++) {
            Node duke = svgContent.getNode(String.format("walk%02d", index));
            duke.setOpacity(0.0);
            walkingDuke.getChildren().add(duke);
        }

        Timeline walkingAnimation = new Timeline();

        // 一定時間ごとに、透明度を変化させて、表示させるイメージを切り替える
        KeyFrame keyFrame0 = new KeyFrame(Duration.millis(0),
                new KeyValue(walkingDuke.getChildren().get(0).opacityProperty(), 1.0, Interpolator.DISCRETE),
                new KeyValue(walkingDuke.getChildren().get(4).opacityProperty(), 0.0, Interpolator.DISCRETE));
        walkingAnimation.getKeyFrames().add(keyFrame0);

        for (int i = 1; i < 5; i++) {
            KeyFrame keyFrame = new KeyFrame(Duration.millis(200*i),
                    new KeyValue(walkingDuke.getChildren().get(i).opacityProperty(), 1.0, Interpolator.DISCRETE),
                    new KeyValue(walkingDuke.getChildren().get(i-1).opacityProperty(), 0.0, Interpolator.DISCRETE));
            walkingAnimation.getKeyFrames().add(keyFrame);
        }

        // 無限に繰り返し
        walkingAnimation.setCycleCount(Timeline.INDEFINITE);

        return walkingAnimation;
    }

    public static void main(String... args) {
        launch(args);
    }
}
Merry Christmas by JavaFX
This entry is the translation of 25 Dec. entry of JavaFX Advent Calendar.
The previous entry was Java FX on PI so far ‘beta’ to use by @masafumi_ohta.
The original entry was published on Christmas, so I wrote Christmas Card application by JavaFX.
The image of accomplished application is shown below:
I wrote two animations: one is snow flying, and the other is neon illumination .
Background image is ImageView. I used Canvas class for snow flying and shapes for llumination.
Snow flake is just circle, drawn by GraphicsContext#fillOval method. To add blur, GraphicsContext#setEffect method was used.
The snow radius, transparency, and size of blur is decided by random value.
    private double x;
    private double y;
    private double radius;
    private Color color;
    private BoxBlur blur;

    private Random random = new Random();

    public SnowParticle(double initX) {
        x = initX;
        y = 0.0;
        radius = random.nextDouble() * MAX_RADIUS;
        color = Color.rgb(255, 255, 255, random.nextDouble());
        double blurSize = random.nextDouble() * MAX_BLUR + MAX_BLUR;
        blur = new BoxBlur(blurSize, blurSize, 2);
    }

    public void draw(GraphicsContext context) {
        context.setFill(color);
        context.setEffect(blur);

        context.fillOval(x, y, radius, radius);
    }
One of constructor argument, initX is initial x position of snow. Because every snow flies from y = 0, y is not assigned.
Because of random determination of radius, transparency and size of blur, appearances of snow flakes vary. This shows a sense of perspective.
I didn't use Timeline class nor Transition, but AnimationTimer class.
AnimationTimer calls handle method in appropriate cycle. Therefore, the coordinate of snow is updated by random value and drawn.
The coordinate updating process is described in SnowParticle#update method.
    public double update() {
        x += random.nextDouble() * MAX_STAGGER - MAX_STAGGER / 2.0;
        y += random.nextDouble() * MAX_STAGGER;

        return y;
    }
To snow lightly, the next coordinate of snow is defined by random. As well as y-coordinate, x-coordinate is defined by random.
The method that calls update method and draw method of SnowParticle class is update method of ChristmasCard class.
There are many snow flakes in the scene, so List object store the SnowParticle objects. If y-coordinate of SnowParticle object is bigger than height of Scene, the SnowParticle object is removed from List. When calling ChristmasCard#update method, SnowParticle object is created randomly.
When drawing to Canvas, we should paint the Canvas with transparency color at first, then draw snow.
    private void update() {
        GraphicsContext context = snowCanvas.getGraphicsContext2D();

        context.setFill(Color.rgb(0, 0, 0, 0.0));
        context.fillRect(0, 0, snowCanvas.getWidth(), snowCanvas.getHeight());

        Iterator<SnowParticle> it = particles.iterator();
        while (it.hasNext()) {
            SnowParticle particle = it.next();

            double y = particle.update();
            if (y >= snowCanvas.getHeight()) {
                // When SnowParticle move to the bottom of Scene
                // it is removed
                it.remove();
            } else {
                particle.draw(context);
            }
        }

        // Creating SnowParticle object randomly
        if (random.nextInt(3) == 0) {
            particles.add(new SnowParticle(random.nextDouble() * snowCanvas.getWidth()));
        }
    }
Next is the illumination. I thought I used Text class for illumination at first. But I used SVG.
I used SVGLoader for loading SVG file.
Shape objects loaded from SVG file are divided into stroke and fill. Strokes and fills are animated separately.
There are 14 shapes (14 characters), so I used for loop to set animation. I didn't know that I wasn't able to add KeyValue objects to KeyFrame object after KeyFrame instanciation, because Set object gotten by KeyFrame#getValues was immutable.
Therefore, I make KeyFrame object in the loop, and then add the KeyFrame object to Timeline object.
    private void initIllumination() {
        Timeline timeline = new Timeline();

        SVGContent svgContent = SVGLoader.load(getClass().getResource("illumination.svg").toString());

        for (int i = 1; i < 15; i++ ) {
            Shape ch = (Shape)svgContent.getNode(String.format("merry%02d", i));
            ch.setEffect(new DropShadow(BlurType.GAUSSIAN, Color.YELLOW, 20.0, 0.4, 0.0, 0.0));
            ch.setStroke(TRANSPARENT);
            ch.setFill(TRANSPARENT);
            ch.setTranslateX(50);
            ch.setTranslateY(40);

            illuminationPane.getChildren().add(ch);

            KeyFrame frame0 = new KeyFrame(Duration.ZERO,
                                           new KeyValue(ch.strokeProperty(), TRANSPARENT),
                                           new KeyValue(ch.fillProperty(), TRANSPARENT));
            KeyFrame frame1 = new KeyFrame(Duration.seconds(2),
                                           new KeyValue(ch.strokeProperty(), TRANSPARENT),
                                           new KeyValue(ch.fillProperty(), TRANSPARENT));
            KeyFrame frame2 = new KeyFrame(Duration.seconds(5),
                                           new KeyValue(ch.strokeProperty(), Color.YELLOW),
                                           new KeyValue(ch.fillProperty(), TRANSPARENT));
            KeyFrame frame3 = new KeyFrame(Duration.seconds(6),
                                           new KeyValue(ch.strokeProperty(), Color.YELLOW),
                                           new KeyValue(ch.fillProperty(), Color.WHITE));
            KeyFrame frame4 = new KeyFrame(Duration.seconds(10),
                                           new KeyValue(ch.strokeProperty(), Color.YELLOW),
                                           new KeyValue(ch.fillProperty(), Color.WHITE));
            KeyFrame frame5 = new KeyFrame(Duration.seconds(12),
                                           new KeyValue(ch.strokeProperty(), Color.YELLOW),
                                           new KeyValue(ch.fillProperty(), TRANSPARENT));
            KeyFrame frame6 = new KeyFrame(Duration.seconds(15),
                                           new KeyValue(ch.strokeProperty(), TRANSPARENT),
                                           new KeyValue(ch.fillProperty(), TRANSPARENT));

            timeline.getKeyFrames().addAll(frame0, frame1, frame2, frame3, frame4, frame5, frame6);
        }

        timeline.setCycleCount(Timeline.INDEFINITE);
        timeline.play();
    }
To shine characters, I used DropShadow. Bloom is also OK, but I prefer DropShadow class because DropShadow has properties for appearance adjustment.
I uploaded this project to GitHub: JavaFXChristmasCard.
@irof Drawing Song by JavaFX #2
This entry is the translation of 22 Dec. entry of JavaFX Advent Calendar.
The previous entry was JavaFX using JDK1.8 Lambda Expression by @tomo_taka01.
The next entry was irof Advent Calendar 23rd by @fukai_yas.
The reason I wrote @irof Drawing Song by JavaFX #2 is that I regretted the previous @irof Drawing Song. I used JavaFX, but NO ANIMATION!!
Animation is the one of most important JavaFX features, so I used animation on this entry.
However, how do I make shape animation? For this purpose, Transitions aren't suitable. Therefore, I used Timeline class.
For example, I explain line stretching animation: one edge point of line moves, the other doesn't move.
Line class has 4 properties about Line location: startX, startY, endX, and endY. For line stretching, endX and endY move from the same position of startX and startY to target point.
For instance, an animation that end point moves from (0, 0) to (300, 100) is indicated by the following code:
        Line line = new Line(0.0, 0.0, 0.0, 0.0);
        container.getChildren().add(line);

        // end point moves from (0, 0) to (300, 100)
        new Timeline(
            new KeyFrame(Duration.ZERO, new KeyValue(line.endXProperty(), 0.0),
                                        new KeyValue(line.endYProperty(), 0.0)),
            new KeyFrame(new Duration(500), new KeyValue(line.endXProperty(), 300.0),
                                            new KeyValue(line.endYProperty(), 100.0))
        ).play();
In case of drawing circle, I don't use Circle class, but Arc class. That is the animation that length property increases from 0 to 360.
        Arc arc = new Arc(100.0, 100.0, 50.0, 50.0, 0.0, 0.0);
        arc.setFill(null);
        arc.setStroke(Color.BLACK);
        container.getChildren().add(arc);

        // drawing circle: length increases from 0 to 360
        new Timeline(
            new KeyFrame(Duration.ZERO, new KeyValue(arc.lengthProperty(), 0.0)),
            new KeyFrame(new Duration(500), new KeyValue(arc.lengthProperty(), 360.0))
        ).play();
However, if adding all of curves or lines at first, the dots are plotted. Therefore, when the previous animation finish, the next animated shape is added to the container.
In case that rightBorder is animated after drawing topBorder, the source code is indicated below:
        Line topBorder = new Line(0.0, 0.0, 0.0, 0.0);
        topBorder.setStrokeWidth(5.0);
        container.getChildren().add(topBorder);

        new Timeline(
            new KeyFrame(Duration.ZERO, new KeyValue(topBorder.endXProperty(), 0.0)),
            new KeyFrame(new Duration(500),
                         new EventHandler<ActionEvent>() {
                             @Override
                             public void handle(ActionEvent t) {
                                 // add next animated shape is added
                                 container.getChildren().add(rightBorder);
                             }
                         },
                         new KeyValue(topBorder.endXProperty(), 300.0))
        ).play();
KeyFrame object calls EventHandler#handle method when duration reached the target time, so I discribed the procedure of adding the next shape to the container into the handle method.
The hardest point was the balloon when I made this drawing song animation. Especially, Bézier curve animation.
I used two Bézier curves in the sample. First one wasn't hard, but second one was too hard for me. The reason was that end point moves along the first Bézier curves while moving end point.
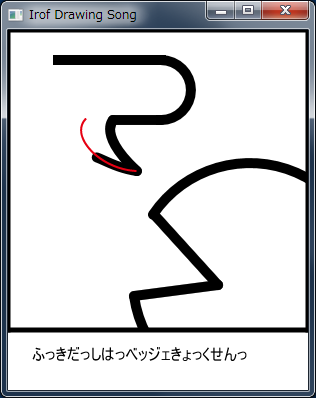
The following draw is indicated the reason. The red line is between the start point and the end point of the second Bézier curves. The red line is located on the Bézier curves, so the end poinnt moves along the first Bézier curves like revers P.
However, the animation I want to do is that the end point moves along the red line of the following figure.
PathTransition is used for animation that a node moves along a path, and PathTransition makes whole node move along path. But, I'd like to move only end point of Bézier curve along path.
An idea came to me!
I used PathTransition to move hidden circle, and bound end point to center of hidden circle plus quantity of transition.
        final CubicCurve curve2 = new CubicCurve(129, 141, 90, 135, 66, 120, 129, 141);
        curve2.setFill(null);
        curve2.setStroke(Color.BLACK);
        curve2.setStrokeWidth(10.0);
        curve2.setStrokeLineCap(StrokeLineCap.ROUND);

        final CubicCurve drawPath = new CubicCurve(129, 141, 90, 135, 66, 120, 81, 90);
        // Hidden circle (not include in Scene Graph)
        final Circle circle = new Circle(129, 141, 1);

        // end point bind to center of circle plus quantiti of transition
        curve2.endXProperty().bind(Bindings.add(circle.centerXProperty(),
                                               circle.translateXProperty()));
        curve2.endYProperty().bind(Bindings.add(circle.centerYProperty(),
                                               circle.translateYProperty()));

        // Move hidden circle
        PathTransition transition = new PathTransition(new Duration(500), drawPath);
        transition.setNode(circle);
When the hidden circle moves, the end point moves simultaneously!
However, if I don't made control points of the Bézier curves move, the Bézier curves curvature is too big at first. So, I made control points also move. But the control points animation was not good, so the Bézier curves bend suddenly at the end of animation.
I upload Completed animation to YouTube.
I also update source code to gist:github.
Binding Sample
This entry is the translation of 18 Dec. entry of JavaFX Advent Calendar.
The previous entry was Refinement for existing application GUI by JavaFX (halfway...) by @rewtheblow.
The next entry was JavaFX Utilities by @yumix_h.
I'm serializing JavaFX article in Japanese web magazine ITpro. I picked up property and binding on the article of January.
For the article, I made some samples. However, I didn't use all samples because of too much pages.
MOTTAINAI!! (What a waste!!)
So, I'll show the sample here.
The sample is connected balls.
You can drag the balls, and the connection follows up the dragged ball like rubber band. To connect the balls and the connection, edge points of the connection are bound to the center of balls.
At first, I'll explain how to drag the balls.
When starting dragging, MouseEvent is occurred, and the application stores difference between the center location of the ball and the location of mouse cursor. The application update the center location of the ball from the present mouse cursor and the stored difference, while dragging the ball.
class Ball extends Circle {
    private double dragBaseX;
    private double dragBaseY;

    public Ball(double centerX, double centerY, double radius) {
        super(centerX, centerY, radius);

        setOnMousePressed(new EventHandler<MouseEvent>() {
            @Override
            public void handle(MouseEvent event) {
                // store the difference between mouse cursor and the center of the ball.
                dragBaseX = event.getSceneX() - getCenterX();
                dragBaseY = event.getSceneY() - getCenterY();
            }
        });

        setOnMouseDragged(new EventHandler<MouseEvent>() {
            @Override
            public void handle(MouseEvent event) {
                // update the center of the ball from the present mouse cursor
                // and the stored difference.
                setCenterX(event.getSceneX() - dragBaseX);
                setCenterY(event.getSceneY() - dragBaseY);
            }
        });
    }
}
Next is the connection. The only thing to do is that the edge points of the connection bound to the center of the balls.
class Connection extends Line {
    public Connection(Ball startBall, Ball endBall) {
        // bind the edge points to the center of the balls
        startXProperty().bind(startBall.centerXProperty());
        startYProperty().bind(startBall.centerYProperty());
        endXProperty().bind(endBall.centerXProperty());
        endYProperty().bind(endBall.centerYProperty());
    }
}
That's all! It is easy, isn't it?
@irof Drawing Song by JavaFX
This entry is the translation of 14 Dec. entry of JavaFX Advent Calendar.
Yesterday entry was Trying Groovy's @Vetoable bindings in JavaFX Application by mike_neck.
@irof is a famous blogger in Japan, and irof advent calendar was organized by irof's friends. This entry isn't an entry of irof advent calenar, however I dedicated this entry to irof ;-)
In this entry, I'll show irof icon drawing song. The song is based on Draing irof icon by Canvas of HTML 5 (japanese) by @yukieen.
When drawing icon by JavaFX, we have two choices: one is Shape class, the other is Canvas class. I used Shape in this entry.
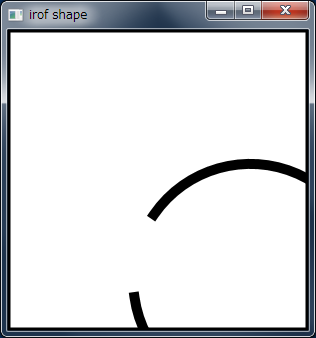
At the first, drawing icon border. I used Rectangle class for the border.
        Group root = new Group();

        // Drawing icon border
        Rectangle rectangle = new Rectangle(0, 0, 300, 300);
        rectangle.setStrokeWidth(5.0);
        rectangle.setStroke(Color.BLACK);
        rectangle.setFill(Color.WHITE);
        root.getChildren().add(rectangle);
Next step is outline. Arc class is OK, but I used Path class because I'd like to connect face to mouth lines.
At first I create Path object, then add XXXTo object. XXX is varied. For example, XXX is Move when moving point, and Arc when drawing arc.
It's to be noted that ArcTo class properties are different from Arc class properties. Because of the difference, I wasted time to convert properties values :-(
        // Path object for outline
        Path path = new Path();
        path.setStrokeWidth(10.0);
        path.setStroke(Color.BLACK);
        // Clipping to fit into icon border
        path.setClip(new Rectangle(0, 0, 300, 300));

        // Start point of outline
        path.getElements().add(new MoveTo(126.5, 267));
        // face line
        ArcTo arc = new ArcTo();
        arc.setX(146); arc.setY(184.5);
        arc.setRadiusX(117); arc.setRadiusY(117);
        arc.setLargeArcFlag(true);
        path.getElements().add(arc);
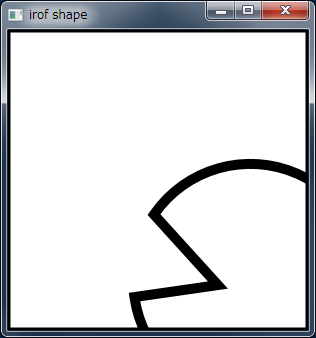
Then, dwaing mouth. Mouth is constructed by line, so I added LineTo object to Path object. At the end, to close path, I added CloseTo object.
        // Lines of mouth
        path.getElements().add(new LineTo(210, 255));
        // Close path
        path.getElements().add(new ClosePath());
        root.getChildren().add(path);
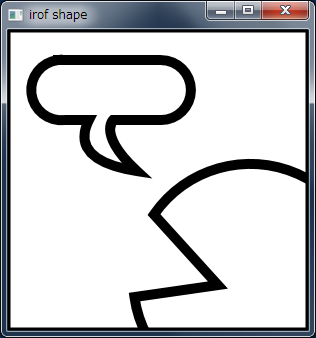
Next is balloon. Balloon is also constrcted by Path class. I use Bézier curve for prickle part.
        // Balloon
        path = new Path();
        path.setStrokeWidth(10.0);
        path.setStroke(Color.BLACK);
        path.getElements().add(new MoveTo(50, 30));
        path.getElements().add(new LineTo(153, 30));
        arc = new ArcTo();
        arc.setX(153); arc.setY(90);
        arc.setRadiusX(30); arc.setRadiusY(30);
        arc.setSweepFlag(true);
        path.getElements().add(arc);
        path.getElements().add(new LineTo(105, 90));

        // Using Bézier curve for prickle part
        path.getElements().add(new CubicCurveTo(105, 90, 90, 105, 129, 141));
        path.getElements().add(new CubicCurveTo(90, 135, 66, 120, 81, 90));

        path.getElements().add(new LineTo(57, 90));
        arc = new ArcTo();
        arc.setX(50); arc.setY(30);
        arc.setRadiusX(30); arc.setRadiusY(30);
        arc.setSweepFlag(true);
        path.getElements().add(arc);
        root.getChildren().add(path);
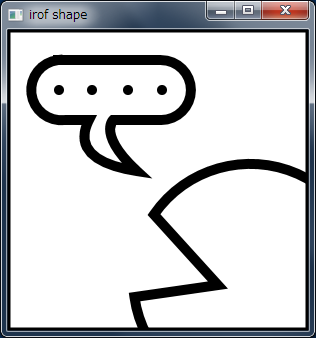
Dots in the balloon are Circle objects.
        // Dots in the balloon
        Circle circle = new Circle(51, 60, 5, Color.BLACK);
        root.getChildren().add(circle);
        circle = new Circle(84, 60, 5, Color.BLACK);
        root.getChildren().add(circle);
        circle = new Circle(120, 60, 5, Color.BLACK);
        root.getChildren().add(circle);
        circle = new Circle(154, 60, 5, Color.BLACK);
        root.getChildren().add(circle);
At the end, draing eye. Eye is also Circle object.
        // Circle
        circle = new Circle(255, 204, 15);
        circle.setFill(null);
        circle.setStroke(Color.BLACK);
        circle.setStrokeWidth(10);
        root.getChildren().add(circle);
That's all!
I uploaded source code to gist:github.
PixelReader/PixelWriter
This entry is the translation of 4 Dec. entry of JavaFX Advent Calendar.
Recently, I had several times to give presentations about JaaFX 2.2.
I talked some features in the presentations, and showed demonstrations.
Today, I introduce one of the the features: PixelReader/PixelWriter,
and show a demonstation that was made for these presentation.
JavaFX 2.2 began support of bitmap images. The main classes that deal with
bitmap images are PixelReader class and PixelWriter class.
PixelReader reads pixels from a Image object, and PixelWriter writes pixels to a
WritableImage object. WritableImage class is a subclass of Image class. It's similar
to BufferedImage class of Java 2D.
PixelReader/PixelWriter defined some API, however I start reading 1 pixel and
writing 1 pixel.
For example, copying a image.
    Image src = new Image(...);
    PixelReader reader = src.getPixelReader();

    int width = (int)src.getWidth();
    int height = (int)src.getHeight();

    WritableImage dest = new WritableImage(width, height);
    PixelWriter writer = dest.getPixelWriter();

    for (int x = 0; x < width; x++) {
        for (int y = 0; y < height; y++) {
            // reading a pixel from src image,
            // then writing a pixel to dest image
            Color color = reader.getColor(x, y);
            writer.setColor(x, y, color);

            // this way is also OK
//            int argb = reader.getArgb(x, y);
//            writer.setArgb(x, y, argb);
        }
    }
getPixelReader method of Image class is used for acquiring PixelReader object.
WritableImage is generated with width and height. After that, to acquire
PixelWriter call get PixelWriter method.
PixelReader#getColor(x, y) reads (x, y) pixel, and the return value type of
getColor method is Color class. In a similar way, PixelWriter#setColor(x, y, color)
writes (x, y) pixel to the color.
Similar method getArgb is reading a pixel, and the return type is int.
Top 8 bit of return value indicates alpha, next 8 bit indicates red, next 8 bit green,
and then blue.
This sample is the simplest use of PixelReader/PixelWriter, then I try little bit
complicated sample. That is image blur.
In the sample, I use box blur. It's the simplest blur method.
How to blur is reading both neighbor pixels around target pixel, averaging these
pixels color, and then write the target pixel with the average color.
If the neighbor is square, then it is box blur.
    private void blur() {
        PixelReader reader = src.getPixelReader();
        PixelWriter writer = dest.getPixelWriter();

        for (int x = 0; x < width; x++) {
            for (int y = 0; y < height; y++) {
                double red = 0;
                double green = 0;
                double blue = 0;
                double alpha = 0;
                int count = 0;

                // reading neighbor pixels
                for (int i = -kernelSize; i <= kernelSize; i++) {
                    for (int j = -kernelSize; j <= kernelSize; j++) {
                        if (x + i < 0 || x + i >= width
                           || y + j < 0 || y + j >= height) {
                            continue;
                        }
                        Color color = reader.getColor(x + i, y + j);
                        red += color.getRed();
                        green += color.getGreen();
                        blue += color.getBlue();
                        alpha += color.getOpacity();
                        count++;
                    }
                }
                Color blurColor = Color.color(red / count,
                                              green / count,
                                              blue / count,
                                              alpha / count);
                writer.setColor(x, y, blurColor);
            }
        }
    }
Reading pixels around edge is little bit hard, because some pinxels of neighbor don't exist.
In the case, the system reads all pixels that is able to read, and then average them.
Moreover, I use Slider class to make the quantity of blur.
        slider.valueProperty().addListener(new InvalidationListener() {
            @Override
            public void invalidated(Observable o) {
                DoubleProperty value = (DoubleProperty)o;
                int intValue = (int) value.get();
                if (intValue != kernelSize) {
                    kernelSize = intValue;
                    blur();
                }
            }
        });
A the type of value property of Slider class si double, so the system cast it to int.
The result of execution is the following image:
But, this way is BAD parformance! Especially, when kernelSize become big, the performance
goes down prominently.
The reason is, you know, that the times of reading pixel become huge. Therefore, I should
reduce reading pixels.
How? It's bulk reading.
Bulk pixel reading
Decreasing the number of reading pixels, we can use bulk reading methods. There are three overloading getPixels method. The difference is how to store pixel data: byte, int and Buffer.
I used int in this entry.
One of arguments of PixelReader#getPixels is WritablePixelFormat. Because WritablePixelFormat is abstract class, we can't generate WritablePixelFormat object directly. Therefore, static methods defined by PixelFormat that is superclass of WritablePixelFormat are used for gettting WritablePixelFormat object.
getIntArgbInstance method and getIntArgbPreInstancecorrespond to int and I used getIntArgbInstance in this entry.
getPixes argumets are x, y, width, height, writablePixelFormat, buffer, offset, and scalingStride. Type of buffer is int[], and offset means offset of buffer. The scalingStride shows size of a line to next line.
I rewrote blur method using getPixels and blur2 method is showed blow:
    private void blur2() {
        PixelReader reader = src.getPixelReader();
        PixelWriter writer = dest.getPixelWriter();
        WritablePixelFormat<IntBuffer> format
            = WritablePixelFormat.getIntArgbInstance();

        for (int x = 0; x < width; x++) {
            for (int y = 0; y < height; y++) {
                int centerX = x - kernelSize;
                int centerY = y - kernelSize;
                int kernelWidth = kernelSize * 2 + 1;
                int kernelHeight = kernelSize * 2 + 1;

                if (centerX < 0) {
                    centerX = 0;
                    kernelWidth = x + kernelSize;
                } else if (x + kernelSize >= width) {
                    kernelWidth = width - centerX;
                }

                if (centerY < 0) {
                    centerY = 0;
                    kernelHeight = y + kernelSize;
                } else if (y + kernelSize >= height) {
                    kernelHeight = height - centerY;
                }

                int[] buffer = new int[kernelWidth * kernelHeight];
                reader.getPixels(centerX, centerY,
                                 kernelWidth, kernelHeight,
                                 format, buffer, 0, kernelWidth);

                int alpha = 0;
                int red = 0;
                int green = 0;
                int blue = 0;

                for (int color : buffer) {
                    alpha += (color >>> 24);
                    red += (color >>> 16 & 0xFF);
                    green += (color >>> 8 & 0xFF);
                    blue += (color & 0xFF);
                }

                alpha = alpha / kernelWidth / kernelHeight;
                red = red / kernelWidth / kernelHeight;
                green = green / kernelWidth / kernelHeight;
                blue = blue / kernelWidth / kernelHeight;

                int blurColor = (alpha << 24)
                              + (red << 16)
                              + (green << 8)
                              + blue;
                writer.setArgb(x, y, blurColor);
            }
        }
    }
Because region edges blur process is complicated, lenth of code became longer. However, the performance was improved.
For comparing performance, I used radio buttons to select 1 pixel reader or bulk reading.
Bulk pixel writing
PixelWriter also defines bulk writing methods, in the same way as bulk reading of PixelReader.
So, let's try tessellate image.
The application caliculates an average of neighbor pixels in the same way as blur, but set the average color to all neighbor pixels.
There are four overloaded PixelWriter#setPixels methods: byte, int, ByteBuffer and PixelReader for pixel data. And I used int[] version of setPixels here.
    private void mosaic() {
        PixelReader reader = src.getPixelReader();
        PixelWriter writer = dest.getPixelWriter();
        WritablePixelFormat<IntBuffer> format
            = WritablePixelFormat.getIntArgbInstance();

        for (int x = kernelSize;
             x < width - kernelSize * 2;
             x += kernelSize * 2 + 1) {
            for (int y = kernelSize;
                 y < height - kernelSize * 2;
                 y += kernelSize * 2 + 1) {

                int kernelWidth = kernelSize * 2 + 1;
                int kernelHeight = kernelSize * 2 + 1;

                int[] buffer = new int[kernelWidth * kernelHeight];
                reader.getPixels(x, y,
                                 kernelWidth, kernelHeight,
                                 format, buffer, 0, kernelWidth);

                int alpha = 0;
                int red = 0;
                int green = 0;
                int blue = 0;

                for (int color : buffer) {
                    alpha += (color >>> 24);
                    red += (color >>> 16 & 0xFF);
                    green += (color >>> 8 & 0xFF);
                    blue += (color & 0xFF);
                }
                alpha = alpha / kernelWidth / kernelHeight;
                red = red / kernelWidth / kernelHeight;
                green = green / kernelWidth / kernelHeight;
                blue = blue / kernelWidth / kernelHeight;

                int blurColor = (alpha << 24)
                              + (red << 16)
                              + (green << 8)
                              + blue;
                Arrays.fill(buffer, blurColor);
                writer.setPixels(x, y,
                                 kernelWidth, kernelHeight,
                                 format, buffer, 0, kernelWidth);
            }
        }
    }
The result is shown below:
All sourcecode is shown below:
import java.nio.IntBuffer;
import java.util.Arrays;
import javafx.application.Application;
import javafx.beans.InvalidationListener;
import javafx.beans.Observable;
import javafx.beans.property.DoubleProperty;
import javafx.geometry.Pos;
import javafx.scene.Scene;
import javafx.scene.control.RadioButton;
import javafx.scene.control.Slider;
import javafx.scene.control.ToggleGroup;
import javafx.scene.image.Image;
import javafx.scene.image.ImageView;
import javafx.scene.image.PixelReader;
import javafx.scene.image.PixelWriter;
import javafx.scene.image.WritableImage;
import javafx.scene.image.WritablePixelFormat;
import javafx.scene.layout.AnchorPane;
import javafx.scene.layout.HBox;
import javafx.scene.paint.Color;
import javafx.stage.Stage;

public class WritableImageDemo extends Application {

    private Image src;
    private WritableImage dest;
    private int kernelSize = 1;
    private int width;
    private int height;

    private RadioButton blurButton;
    private RadioButton blur2Button;
    private RadioButton mosaicButton;

    @Override
    public void start(Stage stage) {

        AnchorPane root = new AnchorPane();

        initImage(root);

        Scene scene = new Scene(root);

        stage.setTitle("WritableImage Demo");
        stage.setResizable(false);
        stage.setScene(scene);
        stage.show();
    }

    private void initImage(AnchorPane root) {
        src = new Image("macaron.jpg");
        ImageView srcView = new ImageView(src);
        root.getChildren().add(srcView);
        AnchorPane.setTopAnchor(srcView, 0.0);
        AnchorPane.setLeftAnchor(srcView, 0.0);

        width = (int) src.getWidth();
        height = (int) src.getHeight();
        root.setPrefSize(width * 2.0, height + 50);

        dest = new WritableImage(width, height);
        ImageView destView = new ImageView(dest);
        destView.setTranslateX(width);
        root.getChildren().add(destView);
        AnchorPane.setTopAnchor(destView, 0.0);
        AnchorPane.setRightAnchor(destView, (double) width);

        Slider slider = new Slider(0, 10, kernelSize);
        slider.setPrefSize(width, 50);
        slider.setShowTickLabels(true);
        slider.setShowTickMarks(true);
        slider.setSnapToTicks(true);
        slider.setMajorTickUnit(1.0);
        slider.setMinorTickCount(0);

        slider.valueProperty().addListener(new InvalidationListener() {
            @Override
            public void invalidated(Observable o) {
                DoubleProperty value = (DoubleProperty) o;
                int intValue = (int) value.get();
                if (intValue != kernelSize) {
                    kernelSize = intValue;
                    if (blurButton.isSelected()) {
                        blur();
                    } else if (blur2Button.isSelected()) {
                        blur2();
                    } else {
                        mosaic();
                    }
                }
            }
        });

        root.getChildren().add(slider);
        AnchorPane.setBottomAnchor(slider, 0.0);
        AnchorPane.setRightAnchor(slider, 10.0);

        HBox hbox = new HBox(10);
        hbox.setAlignment(Pos.CENTER);
        hbox.setPrefWidth(width);
        hbox.setPrefHeight(50);
        root.getChildren().add(hbox);
        AnchorPane.setBottomAnchor(hbox, 0.0);
        AnchorPane.setLeftAnchor(hbox, 10.0);

        ToggleGroup group = new ToggleGroup();
        blurButton = new RadioButton("Blur");
        blurButton.setToggleGroup(group);
        blurButton.setSelected(true);
        hbox.getChildren().add(blurButton);
        blur2Button = new RadioButton("Blur2");
        blur2Button.setToggleGroup(group);
        hbox.getChildren().add(blur2Button);
        mosaicButton = new RadioButton("Mosaic");
        mosaicButton.setToggleGroup(group);
        hbox.getChildren().add(mosaicButton);

        blur();
    }

    private void blur() {
        PixelReader reader = src.getPixelReader();
        PixelWriter writer = dest.getPixelWriter();

        for (int x = 0; x < width; x++) {
            for (int y = 0; y < height; y++) {
                double red = 0;
                double green = 0;
                double blue = 0;
                double alpha = 0;
                int count = 0;
                for (int i = -kernelSize; i <= kernelSize; i++) {
                    for (int j = -kernelSize; j <= kernelSize; j++) {
                        if (x + i < 0 || x + i >= width
                           || y + j < 0 || y + j >= height) {
                            continue;
                        }
                        Color color = reader.getColor(x + i, y + j);
                        red += color.getRed();
                        green += color.getGreen();
                        blue += color.getBlue();
                        alpha += color.getOpacity();
                        count++;
                    }
                }
                Color blurColor = Color.color(red / count,
                                              green / count,
                                              blue / count,
                                              alpha / count);
                writer.setColor(x, y, blurColor);
            }
        }
    }

    private void blur2() {
        PixelReader reader = src.getPixelReader();
        PixelWriter writer = dest.getPixelWriter();
        WritablePixelFormat<IntBuffer> format
            = WritablePixelFormat.getIntArgbInstance();

        for (int x = 0; x < width; x++) {
            for (int y = 0; y < height; y++) {
                int centerX = x - kernelSize;
                int centerY = y - kernelSize;
                int kernelWidth = kernelSize * 2 + 1;
                int kernelHeight = kernelSize * 2 + 1;

                if (centerX < 0) {
                    centerX = 0;
                    kernelWidth = x + kernelSize;
                } else if (x + kernelSize >= width) {
                    kernelWidth = width - centerX;
                }

                if (centerY < 0) {
                    centerY = 0;
                    kernelHeight = y + kernelSize;
                } else if (y + kernelSize >= height) {
                    kernelHeight = height - centerY;
                }

                int[] buffer = new int[kernelWidth * kernelHeight];
                reader.getPixels(centerX, centerY,
                                 kernelWidth, kernelHeight,
                                 format, buffer, 0, kernelWidth);

                int alpha = 0;
                int red = 0;
                int green = 0;
                int blue = 0;

                for (int color : buffer) {
                    alpha += (color >>> 24);
                    red += (color >>> 16 & 0xFF);
                    green += (color >>> 8 & 0xFF);
                    blue += (color & 0xFF);
                }
                alpha = alpha / kernelWidth / kernelHeight;
                red = red / kernelWidth / kernelHeight;
                green = green / kernelWidth / kernelHeight;
                blue = blue / kernelWidth / kernelHeight;

                int blurColor = (alpha << 24)
                              + (red << 16)
                              + (green << 8)
                              + blue;
                writer.setArgb(x, y, blurColor);
            }
        }
    }

    private void mosaic() {
        PixelReader reader = src.getPixelReader();
        PixelWriter writer = dest.getPixelWriter();
        WritablePixelFormat<IntBuffer> format
            = WritablePixelFormat.getIntArgbInstance();

        for (int x = kernelSize; x < width - kernelSize * 2; x += kernelSize * 2 + 1) {
            for (int y = kernelSize; y < height - kernelSize * 2; y += kernelSize * 2 + 1) {
                int kernelWidth = kernelSize * 2 + 1;
                int kernelHeight = kernelSize * 2 + 1;

                int[] buffer = new int[kernelWidth * kernelHeight];
                reader.getPixels(x, y,
                                 kernelWidth, kernelHeight,
                                 format, buffer, 0, kernelWidth);

                int alpha = 0;
                int red = 0;
                int green = 0;
                int blue = 0;

                for (int color : buffer) {
                    alpha += (color >>> 24);
                    red += (color >>> 16 & 0xFF);
                    green += (color >>> 8 & 0xFF);
                    blue += (color & 0xFF);
                }
                alpha = alpha / kernelWidth / kernelHeight;
                red = red / kernelWidth / kernelHeight;
                green = green / kernelWidth / kernelHeight;
                blue = blue / kernelWidth / kernelHeight;

                int blurColor = (alpha << 24)
                              + (red << 16)
                              + (green << 8)
                              + blue;
                Arrays.fill(buffer, blurColor);
                writer.setPixels(x, y,
                                 kernelWidth, kernelHeight,
                                 format, buffer, 0, kernelWidth);
            }
        }
    }

    public static void main(String[] args) {
        launch(args);
    }
}


