Merry Christmas by JavaFX
This entry is the translation of 25 Dec. entry of JavaFX Advent Calendar.
The previous entry was Java FX on PI so far ‘beta’ to use by @masafumi_ohta.
The original entry was published on Christmas, so I wrote Christmas Card application by JavaFX.
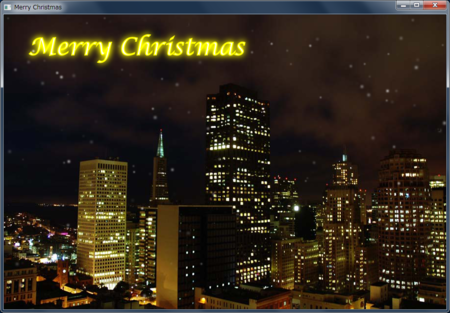
The image of accomplished application is shown below:
I wrote two animations: one is snow flying, and the other is neon illumination .
Background image is ImageView. I used Canvas class for snow flying and shapes for llumination.
Snow flake is just circle, drawn by GraphicsContext#fillOval method. To add blur, GraphicsContext#setEffect method was used.
The snow radius, transparency, and size of blur is decided by random value.
    private double x;
    private double y;
    private double radius;
    private Color color;
    private BoxBlur blur;

    private Random random = new Random();

    public SnowParticle(double initX) {
        x = initX;
        y = 0.0;
        radius = random.nextDouble() * MAX_RADIUS;
        color = Color.rgb(255, 255, 255, random.nextDouble());
        double blurSize = random.nextDouble() * MAX_BLUR + MAX_BLUR;
        blur = new BoxBlur(blurSize, blurSize, 2);
    }

    public void draw(GraphicsContext context) {
        context.setFill(color);
        context.setEffect(blur);

        context.fillOval(x, y, radius, radius);
    }
One of constructor argument, initX is initial x position of snow. Because every snow flies from y = 0, y is not assigned.
Because of random determination of radius, transparency and size of blur, appearances of snow flakes vary. This shows a sense of perspective.
I didn't use Timeline class nor Transition, but AnimationTimer class.
AnimationTimer calls handle method in appropriate cycle. Therefore, the coordinate of snow is updated by random value and drawn.
The coordinate updating process is described in SnowParticle#update method.
    public double update() {
        x += random.nextDouble() * MAX_STAGGER - MAX_STAGGER / 2.0;
        y += random.nextDouble() * MAX_STAGGER;

        return y;
    }
To snow lightly, the next coordinate of snow is defined by random. As well as y-coordinate, x-coordinate is defined by random.
The method that calls update method and draw method of SnowParticle class is update method of ChristmasCard class.
There are many snow flakes in the scene, so List object store the SnowParticle objects. If y-coordinate of SnowParticle object is bigger than height of Scene, the SnowParticle object is removed from List. When calling ChristmasCard#update method, SnowParticle object is created randomly.
When drawing to Canvas, we should paint the Canvas with transparency color at first, then draw snow.
    private void update() {
        GraphicsContext context = snowCanvas.getGraphicsContext2D();

        context.setFill(Color.rgb(0, 0, 0, 0.0));
        context.fillRect(0, 0, snowCanvas.getWidth(), snowCanvas.getHeight());

        Iterator<SnowParticle> it = particles.iterator();
        while (it.hasNext()) {
            SnowParticle particle = it.next();

            double y = particle.update();
            if (y >= snowCanvas.getHeight()) {
                // When SnowParticle move to the bottom of Scene
                // it is removed
                it.remove();
            } else {
                particle.draw(context);
            }
        }

        // Creating SnowParticle object randomly
        if (random.nextInt(3) == 0) {
            particles.add(new SnowParticle(random.nextDouble() * snowCanvas.getWidth()));
        }
    }
Next is the illumination. I thought I used Text class for illumination at first. But I used SVG.
I used SVGLoader for loading SVG file.
Shape objects loaded from SVG file are divided into stroke and fill. Strokes and fills are animated separately.
There are 14 shapes (14 characters), so I used for loop to set animation. I didn't know that I wasn't able to add KeyValue objects to KeyFrame object after KeyFrame instanciation, because Set object gotten by KeyFrame#getValues was immutable.
Therefore, I make KeyFrame object in the loop, and then add the KeyFrame object to Timeline object.
    private void initIllumination() {
        Timeline timeline = new Timeline();

        SVGContent svgContent = SVGLoader.load(getClass().getResource("illumination.svg").toString());

        for (int i = 1; i < 15; i++ ) {
            Shape ch = (Shape)svgContent.getNode(String.format("merry%02d", i));
            ch.setEffect(new DropShadow(BlurType.GAUSSIAN, Color.YELLOW, 20.0, 0.4, 0.0, 0.0));
            ch.setStroke(TRANSPARENT);
            ch.setFill(TRANSPARENT);
            ch.setTranslateX(50);
            ch.setTranslateY(40);

            illuminationPane.getChildren().add(ch);

            KeyFrame frame0 = new KeyFrame(Duration.ZERO,
                                           new KeyValue(ch.strokeProperty(), TRANSPARENT),
                                           new KeyValue(ch.fillProperty(), TRANSPARENT));
            KeyFrame frame1 = new KeyFrame(Duration.seconds(2),
                                           new KeyValue(ch.strokeProperty(), TRANSPARENT),
                                           new KeyValue(ch.fillProperty(), TRANSPARENT));
            KeyFrame frame2 = new KeyFrame(Duration.seconds(5),
                                           new KeyValue(ch.strokeProperty(), Color.YELLOW),
                                           new KeyValue(ch.fillProperty(), TRANSPARENT));
            KeyFrame frame3 = new KeyFrame(Duration.seconds(6),
                                           new KeyValue(ch.strokeProperty(), Color.YELLOW),
                                           new KeyValue(ch.fillProperty(), Color.WHITE));
            KeyFrame frame4 = new KeyFrame(Duration.seconds(10),
                                           new KeyValue(ch.strokeProperty(), Color.YELLOW),
                                           new KeyValue(ch.fillProperty(), Color.WHITE));
            KeyFrame frame5 = new KeyFrame(Duration.seconds(12),
                                           new KeyValue(ch.strokeProperty(), Color.YELLOW),
                                           new KeyValue(ch.fillProperty(), TRANSPARENT));
            KeyFrame frame6 = new KeyFrame(Duration.seconds(15),
                                           new KeyValue(ch.strokeProperty(), TRANSPARENT),
                                           new KeyValue(ch.fillProperty(), TRANSPARENT));

            timeline.getKeyFrames().addAll(frame0, frame1, frame2, frame3, frame4, frame5, frame6);
        }

        timeline.setCycleCount(Timeline.INDEFINITE);
        timeline.play();
    }
To shine characters, I used DropShadow. Bloom is also OK, but I prefer DropShadow class because DropShadow has properties for appearance adjustment.
I uploaded this project to GitHub: JavaFXChristmasCard.
@irof Drawing Song by JavaFX #2
This entry is the translation of 22 Dec. entry of JavaFX Advent Calendar.
The previous entry was JavaFX using JDK1.8 Lambda Expression by @tomo_taka01.
The next entry was irof Advent Calendar 23rd by @fukai_yas.
The reason I wrote @irof Drawing Song by JavaFX #2 is that I regretted the previous @irof Drawing Song. I used JavaFX, but NO ANIMATION!!
Animation is the one of most important JavaFX features, so I used animation on this entry.
However, how do I make shape animation? For this purpose, Transitions aren't suitable. Therefore, I used Timeline class.
For example, I explain line stretching animation: one edge point of line moves, the other doesn't move.
Line class has 4 properties about Line location: startX, startY, endX, and endY. For line stretching, endX and endY move from the same position of startX and startY to target point.
For instance, an animation that end point moves from (0, 0) to (300, 100) is indicated by the following code:
        Line line = new Line(0.0, 0.0, 0.0, 0.0);
        container.getChildren().add(line);

        // end point moves from (0, 0) to (300, 100)
        new Timeline(
            new KeyFrame(Duration.ZERO, new KeyValue(line.endXProperty(), 0.0),
                                        new KeyValue(line.endYProperty(), 0.0)),
            new KeyFrame(new Duration(500), new KeyValue(line.endXProperty(), 300.0),
                                            new KeyValue(line.endYProperty(), 100.0))
        ).play();
In case of drawing circle, I don't use Circle class, but Arc class. That is the animation that length property increases from 0 to 360.
        Arc arc = new Arc(100.0, 100.0, 50.0, 50.0, 0.0, 0.0);
        arc.setFill(null);
        arc.setStroke(Color.BLACK);
        container.getChildren().add(arc);

        // drawing circle: length increases from 0 to 360
        new Timeline(
            new KeyFrame(Duration.ZERO, new KeyValue(arc.lengthProperty(), 0.0)),
            new KeyFrame(new Duration(500), new KeyValue(arc.lengthProperty(), 360.0))
        ).play();
However, if adding all of curves or lines at first, the dots are plotted. Therefore, when the previous animation finish, the next animated shape is added to the container.
In case that rightBorder is animated after drawing topBorder, the source code is indicated below:
        Line topBorder = new Line(0.0, 0.0, 0.0, 0.0);
        topBorder.setStrokeWidth(5.0);
        container.getChildren().add(topBorder);

        new Timeline(
            new KeyFrame(Duration.ZERO, new KeyValue(topBorder.endXProperty(), 0.0)),
            new KeyFrame(new Duration(500),
                         new EventHandler<ActionEvent>() {
                             @Override
                             public void handle(ActionEvent t) {
                                 // add next animated shape is added
                                 container.getChildren().add(rightBorder);
                             }
                         },
                         new KeyValue(topBorder.endXProperty(), 300.0))
        ).play();
KeyFrame object calls EventHandler#handle method when duration reached the target time, so I discribed the procedure of adding the next shape to the container into the handle method.
The hardest point was the balloon when I made this drawing song animation. Especially, Bézier curve animation.
I used two Bézier curves in the sample. First one wasn't hard, but second one was too hard for me. The reason was that end point moves along the first Bézier curves while moving end point.
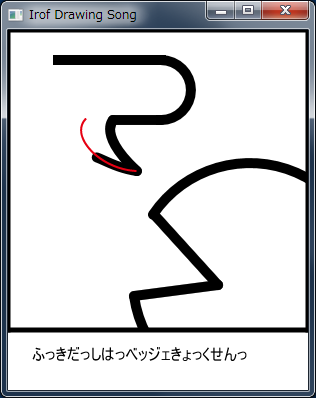
The following draw is indicated the reason. The red line is between the start point and the end point of the second Bézier curves. The red line is located on the Bézier curves, so the end poinnt moves along the first Bézier curves like revers P.
However, the animation I want to do is that the end point moves along the red line of the following figure.
PathTransition is used for animation that a node moves along a path, and PathTransition makes whole node move along path. But, I'd like to move only end point of Bézier curve along path.
An idea came to me!
I used PathTransition to move hidden circle, and bound end point to center of hidden circle plus quantity of transition.
        final CubicCurve curve2 = new CubicCurve(129, 141, 90, 135, 66, 120, 129, 141);
        curve2.setFill(null);
        curve2.setStroke(Color.BLACK);
        curve2.setStrokeWidth(10.0);
        curve2.setStrokeLineCap(StrokeLineCap.ROUND);

        final CubicCurve drawPath = new CubicCurve(129, 141, 90, 135, 66, 120, 81, 90);
        // Hidden circle (not include in Scene Graph)
        final Circle circle = new Circle(129, 141, 1);

        // end point bind to center of circle plus quantiti of transition
        curve2.endXProperty().bind(Bindings.add(circle.centerXProperty(),
                                               circle.translateXProperty()));
        curve2.endYProperty().bind(Bindings.add(circle.centerYProperty(),
                                               circle.translateYProperty()));

        // Move hidden circle
        PathTransition transition = new PathTransition(new Duration(500), drawPath);
        transition.setNode(circle);
When the hidden circle moves, the end point moves simultaneously!
However, if I don't made control points of the Bézier curves move, the Bézier curves curvature is too big at first. So, I made control points also move. But the control points animation was not good, so the Bézier curves bend suddenly at the end of animation.
I upload Completed animation to YouTube.
I also update source code to gist:github.
Binding Sample
This entry is the translation of 18 Dec. entry of JavaFX Advent Calendar.
The previous entry was Refinement for existing application GUI by JavaFX (halfway...) by @rewtheblow.
The next entry was JavaFX Utilities by @yumix_h.
I'm serializing JavaFX article in Japanese web magazine ITpro. I picked up property and binding on the article of January.
For the article, I made some samples. However, I didn't use all samples because of too much pages.
MOTTAINAI!! (What a waste!!)
So, I'll show the sample here.
The sample is connected balls.
You can drag the balls, and the connection follows up the dragged ball like rubber band. To connect the balls and the connection, edge points of the connection are bound to the center of balls.
At first, I'll explain how to drag the balls.
When starting dragging, MouseEvent is occurred, and the application stores difference between the center location of the ball and the location of mouse cursor. The application update the center location of the ball from the present mouse cursor and the stored difference, while dragging the ball.
class Ball extends Circle {
    private double dragBaseX;
    private double dragBaseY;

    public Ball(double centerX, double centerY, double radius) {
        super(centerX, centerY, radius);

        setOnMousePressed(new EventHandler<MouseEvent>() {
            @Override
            public void handle(MouseEvent event) {
                // store the difference between mouse cursor and the center of the ball.
                dragBaseX = event.getSceneX() - getCenterX();
                dragBaseY = event.getSceneY() - getCenterY();
            }
        });

        setOnMouseDragged(new EventHandler<MouseEvent>() {
            @Override
            public void handle(MouseEvent event) {
                // update the center of the ball from the present mouse cursor
                // and the stored difference.
                setCenterX(event.getSceneX() - dragBaseX);
                setCenterY(event.getSceneY() - dragBaseY);
            }
        });
    }
}
Next is the connection. The only thing to do is that the edge points of the connection bound to the center of the balls.
class Connection extends Line {
    public Connection(Ball startBall, Ball endBall) {
        // bind the edge points to the center of the balls
        startXProperty().bind(startBall.centerXProperty());
        startYProperty().bind(startBall.centerYProperty());
        endXProperty().bind(endBall.centerXProperty());
        endYProperty().bind(endBall.centerYProperty());
    }
}
That's all! It is easy, isn't it?
@irof Drawing Song by JavaFX
This entry is the translation of 14 Dec. entry of JavaFX Advent Calendar.
Yesterday entry was Trying Groovy's @Vetoable bindings in JavaFX Application by mike_neck.
@irof is a famous blogger in Japan, and irof advent calendar was organized by irof's friends. This entry isn't an entry of irof advent calenar, however I dedicated this entry to irof ;-)
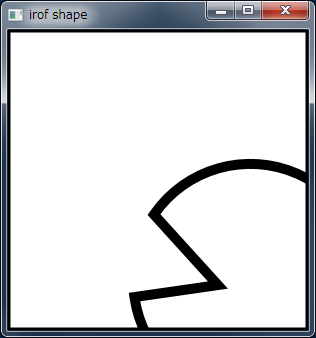
In this entry, I'll show irof icon drawing song. The song is based on Draing irof icon by Canvas of HTML 5 (japanese) by @yukieen.
When drawing icon by JavaFX, we have two choices: one is Shape class, the other is Canvas class. I used Shape in this entry.
At the first, drawing icon border. I used Rectangle class for the border.
        Group root = new Group();

        // Drawing icon border
        Rectangle rectangle = new Rectangle(0, 0, 300, 300);
        rectangle.setStrokeWidth(5.0);
        rectangle.setStroke(Color.BLACK);
        rectangle.setFill(Color.WHITE);
        root.getChildren().add(rectangle);
Next step is outline. Arc class is OK, but I used Path class because I'd like to connect face to mouth lines.
At first I create Path object, then add XXXTo object. XXX is varied. For example, XXX is Move when moving point, and Arc when drawing arc.
It's to be noted that ArcTo class properties are different from Arc class properties. Because of the difference, I wasted time to convert properties values :-(
        // Path object for outline
        Path path = new Path();
        path.setStrokeWidth(10.0);
        path.setStroke(Color.BLACK);
        // Clipping to fit into icon border
        path.setClip(new Rectangle(0, 0, 300, 300));

        // Start point of outline
        path.getElements().add(new MoveTo(126.5, 267));
        // face line
        ArcTo arc = new ArcTo();
        arc.setX(146); arc.setY(184.5);
        arc.setRadiusX(117); arc.setRadiusY(117);
        arc.setLargeArcFlag(true);
        path.getElements().add(arc);
Then, dwaing mouth. Mouth is constructed by line, so I added LineTo object to Path object. At the end, to close path, I added CloseTo object.
        // Lines of mouth
        path.getElements().add(new LineTo(210, 255));
        // Close path
        path.getElements().add(new ClosePath());
        root.getChildren().add(path);
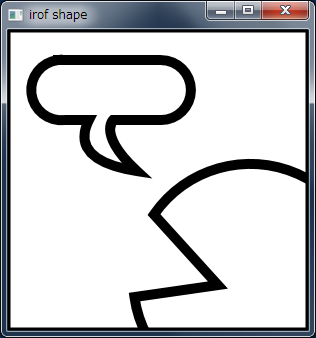
Next is balloon. Balloon is also constrcted by Path class. I use Bézier curve for prickle part.
        // Balloon
        path = new Path();
        path.setStrokeWidth(10.0);
        path.setStroke(Color.BLACK);
        path.getElements().add(new MoveTo(50, 30));
        path.getElements().add(new LineTo(153, 30));
        arc = new ArcTo();
        arc.setX(153); arc.setY(90);
        arc.setRadiusX(30); arc.setRadiusY(30);
        arc.setSweepFlag(true);
        path.getElements().add(arc);
        path.getElements().add(new LineTo(105, 90));

        // Using Bézier curve for prickle part
        path.getElements().add(new CubicCurveTo(105, 90, 90, 105, 129, 141));
        path.getElements().add(new CubicCurveTo(90, 135, 66, 120, 81, 90));

        path.getElements().add(new LineTo(57, 90));
        arc = new ArcTo();
        arc.setX(50); arc.setY(30);
        arc.setRadiusX(30); arc.setRadiusY(30);
        arc.setSweepFlag(true);
        path.getElements().add(arc);
        root.getChildren().add(path);
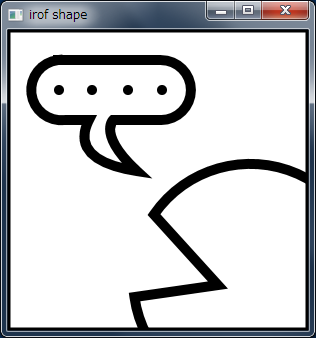
Dots in the balloon are Circle objects.
        // Dots in the balloon
        Circle circle = new Circle(51, 60, 5, Color.BLACK);
        root.getChildren().add(circle);
        circle = new Circle(84, 60, 5, Color.BLACK);
        root.getChildren().add(circle);
        circle = new Circle(120, 60, 5, Color.BLACK);
        root.getChildren().add(circle);
        circle = new Circle(154, 60, 5, Color.BLACK);
        root.getChildren().add(circle);
At the end, draing eye. Eye is also Circle object.
        // Circle
        circle = new Circle(255, 204, 15);
        circle.setFill(null);
        circle.setStroke(Color.BLACK);
        circle.setStrokeWidth(10);
        root.getChildren().add(circle);
That's all!
I uploaded source code to gist:github.
PixelReader/PixelWriter
This entry is the translation of 4 Dec. entry of JavaFX Advent Calendar.
Recently, I had several times to give presentations about JaaFX 2.2.
I talked some features in the presentations, and showed demonstrations.
Today, I introduce one of the the features: PixelReader/PixelWriter,
and show a demonstation that was made for these presentation.
JavaFX 2.2 began support of bitmap images. The main classes that deal with
bitmap images are PixelReader class and PixelWriter class.
PixelReader reads pixels from a Image object, and PixelWriter writes pixels to a
WritableImage object. WritableImage class is a subclass of Image class. It's similar
to BufferedImage class of Java 2D.
PixelReader/PixelWriter defined some API, however I start reading 1 pixel and
writing 1 pixel.
For example, copying a image.
    Image src = new Image(...);
    PixelReader reader = src.getPixelReader();

    int width = (int)src.getWidth();
    int height = (int)src.getHeight();

    WritableImage dest = new WritableImage(width, height);
    PixelWriter writer = dest.getPixelWriter();

    for (int x = 0; x < width; x++) {
        for (int y = 0; y < height; y++) {
            // reading a pixel from src image,
            // then writing a pixel to dest image
            Color color = reader.getColor(x, y);
            writer.setColor(x, y, color);

            // this way is also OK
//            int argb = reader.getArgb(x, y);
//            writer.setArgb(x, y, argb);
        }
    }
getPixelReader method of Image class is used for acquiring PixelReader object.
WritableImage is generated with width and height. After that, to acquire
PixelWriter call get PixelWriter method.
PixelReader#getColor(x, y) reads (x, y) pixel, and the return value type of
getColor method is Color class. In a similar way, PixelWriter#setColor(x, y, color)
writes (x, y) pixel to the color.
Similar method getArgb is reading a pixel, and the return type is int.
Top 8 bit of return value indicates alpha, next 8 bit indicates red, next 8 bit green,
and then blue.
This sample is the simplest use of PixelReader/PixelWriter, then I try little bit
complicated sample. That is image blur.
In the sample, I use box blur. It's the simplest blur method.
How to blur is reading both neighbor pixels around target pixel, averaging these
pixels color, and then write the target pixel with the average color.
If the neighbor is square, then it is box blur.
    private void blur() {
        PixelReader reader = src.getPixelReader();
        PixelWriter writer = dest.getPixelWriter();

        for (int x = 0; x < width; x++) {
            for (int y = 0; y < height; y++) {
                double red = 0;
                double green = 0;
                double blue = 0;
                double alpha = 0;
                int count = 0;

                // reading neighbor pixels
                for (int i = -kernelSize; i <= kernelSize; i++) {
                    for (int j = -kernelSize; j <= kernelSize; j++) {
                        if (x + i < 0 || x + i >= width
                           || y + j < 0 || y + j >= height) {
                            continue;
                        }
                        Color color = reader.getColor(x + i, y + j);
                        red += color.getRed();
                        green += color.getGreen();
                        blue += color.getBlue();
                        alpha += color.getOpacity();
                        count++;
                    }
                }
                Color blurColor = Color.color(red / count,
                                              green / count,
                                              blue / count,
                                              alpha / count);
                writer.setColor(x, y, blurColor);
            }
        }
    }
Reading pixels around edge is little bit hard, because some pinxels of neighbor don't exist.
In the case, the system reads all pixels that is able to read, and then average them.
Moreover, I use Slider class to make the quantity of blur.
        slider.valueProperty().addListener(new InvalidationListener() {
            @Override
            public void invalidated(Observable o) {
                DoubleProperty value = (DoubleProperty)o;
                int intValue = (int) value.get();
                if (intValue != kernelSize) {
                    kernelSize = intValue;
                    blur();
                }
            }
        });
A the type of value property of Slider class si double, so the system cast it to int.
The result of execution is the following image:
But, this way is BAD parformance! Especially, when kernelSize become big, the performance
goes down prominently.
The reason is, you know, that the times of reading pixel become huge. Therefore, I should
reduce reading pixels.
How? It's bulk reading.
Bulk pixel reading
Decreasing the number of reading pixels, we can use bulk reading methods. There are three overloading getPixels method. The difference is how to store pixel data: byte, int and Buffer.
I used int in this entry.
One of arguments of PixelReader#getPixels is WritablePixelFormat. Because WritablePixelFormat is abstract class, we can't generate WritablePixelFormat object directly. Therefore, static methods defined by PixelFormat that is superclass of WritablePixelFormat are used for gettting WritablePixelFormat object.
getIntArgbInstance method and getIntArgbPreInstancecorrespond to int and I used getIntArgbInstance in this entry.
getPixes argumets are x, y, width, height, writablePixelFormat, buffer, offset, and scalingStride. Type of buffer is int[], and offset means offset of buffer. The scalingStride shows size of a line to next line.
I rewrote blur method using getPixels and blur2 method is showed blow:
    private void blur2() {
        PixelReader reader = src.getPixelReader();
        PixelWriter writer = dest.getPixelWriter();
        WritablePixelFormat<IntBuffer> format
            = WritablePixelFormat.getIntArgbInstance();

        for (int x = 0; x < width; x++) {
            for (int y = 0; y < height; y++) {
                int centerX = x - kernelSize;
                int centerY = y - kernelSize;
                int kernelWidth = kernelSize * 2 + 1;
                int kernelHeight = kernelSize * 2 + 1;

                if (centerX < 0) {
                    centerX = 0;
                    kernelWidth = x + kernelSize;
                } else if (x + kernelSize >= width) {
                    kernelWidth = width - centerX;
                }

                if (centerY < 0) {
                    centerY = 0;
                    kernelHeight = y + kernelSize;
                } else if (y + kernelSize >= height) {
                    kernelHeight = height - centerY;
                }

                int[] buffer = new int[kernelWidth * kernelHeight];
                reader.getPixels(centerX, centerY,
                                 kernelWidth, kernelHeight,
                                 format, buffer, 0, kernelWidth);

                int alpha = 0;
                int red = 0;
                int green = 0;
                int blue = 0;

                for (int color : buffer) {
                    alpha += (color >>> 24);
                    red += (color >>> 16 & 0xFF);
                    green += (color >>> 8 & 0xFF);
                    blue += (color & 0xFF);
                }

                alpha = alpha / kernelWidth / kernelHeight;
                red = red / kernelWidth / kernelHeight;
                green = green / kernelWidth / kernelHeight;
                blue = blue / kernelWidth / kernelHeight;

                int blurColor = (alpha << 24)
                              + (red << 16)
                              + (green << 8)
                              + blue;
                writer.setArgb(x, y, blurColor);
            }
        }
    }
Because region edges blur process is complicated, lenth of code became longer. However, the performance was improved.
For comparing performance, I used radio buttons to select 1 pixel reader or bulk reading.
Bulk pixel writing
PixelWriter also defines bulk writing methods, in the same way as bulk reading of PixelReader.
So, let's try tessellate image.
The application caliculates an average of neighbor pixels in the same way as blur, but set the average color to all neighbor pixels.
There are four overloaded PixelWriter#setPixels methods: byte, int, ByteBuffer and PixelReader for pixel data. And I used int[] version of setPixels here.
    private void mosaic() {
        PixelReader reader = src.getPixelReader();
        PixelWriter writer = dest.getPixelWriter();
        WritablePixelFormat<IntBuffer> format
            = WritablePixelFormat.getIntArgbInstance();

        for (int x = kernelSize;
             x < width - kernelSize * 2;
             x += kernelSize * 2 + 1) {
            for (int y = kernelSize;
                 y < height - kernelSize * 2;
                 y += kernelSize * 2 + 1) {

                int kernelWidth = kernelSize * 2 + 1;
                int kernelHeight = kernelSize * 2 + 1;

                int[] buffer = new int[kernelWidth * kernelHeight];
                reader.getPixels(x, y,
                                 kernelWidth, kernelHeight,
                                 format, buffer, 0, kernelWidth);

                int alpha = 0;
                int red = 0;
                int green = 0;
                int blue = 0;

                for (int color : buffer) {
                    alpha += (color >>> 24);
                    red += (color >>> 16 & 0xFF);
                    green += (color >>> 8 & 0xFF);
                    blue += (color & 0xFF);
                }
                alpha = alpha / kernelWidth / kernelHeight;
                red = red / kernelWidth / kernelHeight;
                green = green / kernelWidth / kernelHeight;
                blue = blue / kernelWidth / kernelHeight;

                int blurColor = (alpha << 24)
                              + (red << 16)
                              + (green << 8)
                              + blue;
                Arrays.fill(buffer, blurColor);
                writer.setPixels(x, y,
                                 kernelWidth, kernelHeight,
                                 format, buffer, 0, kernelWidth);
            }
        }
    }
The result is shown below:
All sourcecode is shown below:
import java.nio.IntBuffer;
import java.util.Arrays;
import javafx.application.Application;
import javafx.beans.InvalidationListener;
import javafx.beans.Observable;
import javafx.beans.property.DoubleProperty;
import javafx.geometry.Pos;
import javafx.scene.Scene;
import javafx.scene.control.RadioButton;
import javafx.scene.control.Slider;
import javafx.scene.control.ToggleGroup;
import javafx.scene.image.Image;
import javafx.scene.image.ImageView;
import javafx.scene.image.PixelReader;
import javafx.scene.image.PixelWriter;
import javafx.scene.image.WritableImage;
import javafx.scene.image.WritablePixelFormat;
import javafx.scene.layout.AnchorPane;
import javafx.scene.layout.HBox;
import javafx.scene.paint.Color;
import javafx.stage.Stage;

public class WritableImageDemo extends Application {

    private Image src;
    private WritableImage dest;
    private int kernelSize = 1;
    private int width;
    private int height;

    private RadioButton blurButton;
    private RadioButton blur2Button;
    private RadioButton mosaicButton;

    @Override
    public void start(Stage stage) {

        AnchorPane root = new AnchorPane();

        initImage(root);

        Scene scene = new Scene(root);

        stage.setTitle("WritableImage Demo");
        stage.setResizable(false);
        stage.setScene(scene);
        stage.show();
    }

    private void initImage(AnchorPane root) {
        src = new Image("macaron.jpg");
        ImageView srcView = new ImageView(src);
        root.getChildren().add(srcView);
        AnchorPane.setTopAnchor(srcView, 0.0);
        AnchorPane.setLeftAnchor(srcView, 0.0);

        width = (int) src.getWidth();
        height = (int) src.getHeight();
        root.setPrefSize(width * 2.0, height + 50);

        dest = new WritableImage(width, height);
        ImageView destView = new ImageView(dest);
        destView.setTranslateX(width);
        root.getChildren().add(destView);
        AnchorPane.setTopAnchor(destView, 0.0);
        AnchorPane.setRightAnchor(destView, (double) width);

        Slider slider = new Slider(0, 10, kernelSize);
        slider.setPrefSize(width, 50);
        slider.setShowTickLabels(true);
        slider.setShowTickMarks(true);
        slider.setSnapToTicks(true);
        slider.setMajorTickUnit(1.0);
        slider.setMinorTickCount(0);

        slider.valueProperty().addListener(new InvalidationListener() {
            @Override
            public void invalidated(Observable o) {
                DoubleProperty value = (DoubleProperty) o;
                int intValue = (int) value.get();
                if (intValue != kernelSize) {
                    kernelSize = intValue;
                    if (blurButton.isSelected()) {
                        blur();
                    } else if (blur2Button.isSelected()) {
                        blur2();
                    } else {
                        mosaic();
                    }
                }
            }
        });

        root.getChildren().add(slider);
        AnchorPane.setBottomAnchor(slider, 0.0);
        AnchorPane.setRightAnchor(slider, 10.0);

        HBox hbox = new HBox(10);
        hbox.setAlignment(Pos.CENTER);
        hbox.setPrefWidth(width);
        hbox.setPrefHeight(50);
        root.getChildren().add(hbox);
        AnchorPane.setBottomAnchor(hbox, 0.0);
        AnchorPane.setLeftAnchor(hbox, 10.0);

        ToggleGroup group = new ToggleGroup();
        blurButton = new RadioButton("Blur");
        blurButton.setToggleGroup(group);
        blurButton.setSelected(true);
        hbox.getChildren().add(blurButton);
        blur2Button = new RadioButton("Blur2");
        blur2Button.setToggleGroup(group);
        hbox.getChildren().add(blur2Button);
        mosaicButton = new RadioButton("Mosaic");
        mosaicButton.setToggleGroup(group);
        hbox.getChildren().add(mosaicButton);

        blur();
    }

    private void blur() {
        PixelReader reader = src.getPixelReader();
        PixelWriter writer = dest.getPixelWriter();

        for (int x = 0; x < width; x++) {
            for (int y = 0; y < height; y++) {
                double red = 0;
                double green = 0;
                double blue = 0;
                double alpha = 0;
                int count = 0;
                for (int i = -kernelSize; i <= kernelSize; i++) {
                    for (int j = -kernelSize; j <= kernelSize; j++) {
                        if (x + i < 0 || x + i >= width
                           || y + j < 0 || y + j >= height) {
                            continue;
                        }
                        Color color = reader.getColor(x + i, y + j);
                        red += color.getRed();
                        green += color.getGreen();
                        blue += color.getBlue();
                        alpha += color.getOpacity();
                        count++;
                    }
                }
                Color blurColor = Color.color(red / count,
                                              green / count,
                                              blue / count,
                                              alpha / count);
                writer.setColor(x, y, blurColor);
            }
        }
    }

    private void blur2() {
        PixelReader reader = src.getPixelReader();
        PixelWriter writer = dest.getPixelWriter();
        WritablePixelFormat<IntBuffer> format
            = WritablePixelFormat.getIntArgbInstance();

        for (int x = 0; x < width; x++) {
            for (int y = 0; y < height; y++) {
                int centerX = x - kernelSize;
                int centerY = y - kernelSize;
                int kernelWidth = kernelSize * 2 + 1;
                int kernelHeight = kernelSize * 2 + 1;

                if (centerX < 0) {
                    centerX = 0;
                    kernelWidth = x + kernelSize;
                } else if (x + kernelSize >= width) {
                    kernelWidth = width - centerX;
                }

                if (centerY < 0) {
                    centerY = 0;
                    kernelHeight = y + kernelSize;
                } else if (y + kernelSize >= height) {
                    kernelHeight = height - centerY;
                }

                int[] buffer = new int[kernelWidth * kernelHeight];
                reader.getPixels(centerX, centerY,
                                 kernelWidth, kernelHeight,
                                 format, buffer, 0, kernelWidth);

                int alpha = 0;
                int red = 0;
                int green = 0;
                int blue = 0;

                for (int color : buffer) {
                    alpha += (color >>> 24);
                    red += (color >>> 16 & 0xFF);
                    green += (color >>> 8 & 0xFF);
                    blue += (color & 0xFF);
                }
                alpha = alpha / kernelWidth / kernelHeight;
                red = red / kernelWidth / kernelHeight;
                green = green / kernelWidth / kernelHeight;
                blue = blue / kernelWidth / kernelHeight;

                int blurColor = (alpha << 24)
                              + (red << 16)
                              + (green << 8)
                              + blue;
                writer.setArgb(x, y, blurColor);
            }
        }
    }

    private void mosaic() {
        PixelReader reader = src.getPixelReader();
        PixelWriter writer = dest.getPixelWriter();
        WritablePixelFormat<IntBuffer> format
            = WritablePixelFormat.getIntArgbInstance();

        for (int x = kernelSize; x < width - kernelSize * 2; x += kernelSize * 2 + 1) {
            for (int y = kernelSize; y < height - kernelSize * 2; y += kernelSize * 2 + 1) {
                int kernelWidth = kernelSize * 2 + 1;
                int kernelHeight = kernelSize * 2 + 1;

                int[] buffer = new int[kernelWidth * kernelHeight];
                reader.getPixels(x, y,
                                 kernelWidth, kernelHeight,
                                 format, buffer, 0, kernelWidth);

                int alpha = 0;
                int red = 0;
                int green = 0;
                int blue = 0;

                for (int color : buffer) {
                    alpha += (color >>> 24);
                    red += (color >>> 16 & 0xFF);
                    green += (color >>> 8 & 0xFF);
                    blue += (color & 0xFF);
                }
                alpha = alpha / kernelWidth / kernelHeight;
                red = red / kernelWidth / kernelHeight;
                green = green / kernelWidth / kernelHeight;
                blue = blue / kernelWidth / kernelHeight;

                int blurColor = (alpha << 24)
                              + (red << 16)
                              + (green << 8)
                              + blue;
                Arrays.fill(buffer, blurColor);
                writer.setPixels(x, y,
                                 kernelWidth, kernelHeight,
                                 format, buffer, 0, kernelWidth);
            }
        }
    }

    public static void main(String[] args) {
        launch(args);
    }
}
JavaFX で Merry Christmas!
このエントリーは JavaFX Advent Calendar の 25 日目のエントリーです。
昨日は @masafumi_ohta さんの Java FX on PI so far ‘beta’ to use でした。
明日が最終日で @aoetk さんです。
@aoetk さんには、初日だけでなくおおとりまで務めていただいて、ほんとありがとうございます。
さて、今日はクリスマスなので、クリスマスらしいものを考えてみました。動くクリスマスカードです。
でも、作るだけではなんなので、JavaFX 2.2 の新機能である Canvas を使ってみました。
とりあえず、完成形はこちら。雪が降っていて、ネオンっぽいイルミネーションはアニメーションでついたり消えたりするようになっています。
背景は写真で、白くて丸いのが雪です。この雪を Canvas で描いています。イルミネーションは Canvas ではなく、Shape で描いています。
さて、雪をどうやって描いているかということですが、たいしたことはしていません。単に Canvas に GraphicsContext で丸を描いているのですが、乱数で半径、透明度、ぼかし量を決めています。
    private double x;
    private double y;
    private double radius;
    private Color color;
    private BoxBlur blur;

    private Random random = new Random();

    public SnowParticle(double initX) {
        x = initX;
        y = 0.0;
        radius = random.nextDouble() * MAX_RADIUS;
        color = Color.rgb(255, 255, 255, random.nextDouble());
        double blurSize = random.nextDouble() * MAX_BLUR + MAX_BLUR;
        blur = new BoxBlur(blurSize, blurSize, 2);
    }

    public void draw(GraphicsContext context) {
        context.setFill(color);
        context.setEffect(blur);

        context.fillOval(x, y, radius, radius);
}コンストラクタの引数の initX は一番始めの位置です。雪は y = 0 から降るので、x 座標だけになっています。
半径、透明度、ぼかし量をランダムにしていることで、雪の見え方がまちまちになり、それによって遠近感を醸し出すようにしています。
雪が降るようなアニメーションには Timeline や Transition ではなくて、AnimationTimer を使用しています。
AnimationTimer は適当な間隔で handle メソッドコールするので、そこで座標を再計算し、描画しています。
座標の再計算は SnowParticle クラスの update メソッドで行なっています。
    public double update() {
        x += random.nextDouble() * MAX_STAGGER - MAX_STAGGER / 2.0;
        y += random.nextDouble() * MAX_STAGGER;

        return y;
    }
雪をちらちら降らせるために、次の座標を決めるのにも乱数を使用しています。落ちる量も乱数、左右へのぶれも乱数で決めています。
Snowparticle クラスの update メソッドと draw メソッドをコールしているのが、ChristmasCard クラスの update メソッドです。
雪は 1 つぶではないので、List で保持させています。y 座標が画面からはみ出てしまったら、雪を削除しています。また、update がコールされたら、再び SnowParticle オブジェクトを生成させています (これも乱数で決めていますが)。
    private void update() {
        GraphicsContext context = snowCanvas.getGraphicsContext2D();

        context.setFill(Color.rgb(0, 0, 0, 0.0));
        context.fillRect(0, 0, snowCanvas.getWidth(), snowCanvas.getHeight());

        Iterator<SnowParticle> it = particles.iterator();
        while (it.hasNext()) {
            SnowParticle particle = it.next();

            double y = particle.update();
            if (y >= snowCanvas.getHeight()) {
                it.remove();
            } else {
                particle.draw(context);
            }
        }

        if (random.nextInt(3) == 0) {
            particles.add(new SnowParticle(random.nextDouble() * snowCanvas.getWidth()));
        }
    }
Canvas に描く場合、そのまま描画すると前回の描画に上書きされてしまいます。そこで、はじめに透明色で塗りつぶしてから、雪を描くようにしています。
次のイルミネーションなんですが、Text クラスだけでやろうかと思ったのですが、ストロークとフィルを分けて扱いたかったので、SVG を使ってしまいました。
SVG をロードする部分は SVGLoader を使っています。SVGLoader については SVGLoader のエントリ をご覧ください。
SVG からロードした Shape はアニメーションでストロークとフィルを別々に色を変えるということを行なっています。文字が 14 文字あるので、ループで 14 文字分の KeyValue オブジェクトを作っておいて、後から KeyFrame に追加しようと思ったのですが、できませんでした。
というのも KeyFrame.getValues メソッドで返ってくる Set オブジェクトがイミュタブルで変更不可だからです。
そのため、ちょっと見づらいのですが、ループの中で KeyFrame オブジェクトを作って、Timeline オブジェクトに追加するという方法にしました。
    private void initIllumination() {
        Timeline timeline = new Timeline();

        SVGContent svgContent = SVGLoader.load(getClass().getResource("illumination.svg").toString());

        for (int i = 1; i < 15; i++ ) {
            Shape ch = (Shape)svgContent.getNode(String.format("merry%02d", i));
            ch.setEffect(new DropShadow(BlurType.GAUSSIAN, Color.YELLOW, 20.0, 0.4, 0.0, 0.0));
            ch.setStroke(TRANSPARENT);
            ch.setFill(TRANSPARENT);
            ch.setTranslateX(50);
            ch.setTranslateY(40);

            illuminationPane.getChildren().add(ch);

            KeyFrame frame0 = new KeyFrame(Duration.ZERO,
                                           new KeyValue(ch.strokeProperty(), TRANSPARENT),
                                           new KeyValue(ch.fillProperty(), TRANSPARENT));
            KeyFrame frame1 = new KeyFrame(Duration.seconds(2),
                                           new KeyValue(ch.strokeProperty(), TRANSPARENT),
                                           new KeyValue(ch.fillProperty(), TRANSPARENT));
            KeyFrame frame2 = new KeyFrame(Duration.seconds(5),
                                           new KeyValue(ch.strokeProperty(), Color.YELLOW),
                                           new KeyValue(ch.fillProperty(), TRANSPARENT));
            KeyFrame frame3 = new KeyFrame(Duration.seconds(6),
                                           new KeyValue(ch.strokeProperty(), Color.YELLOW),
                                           new KeyValue(ch.fillProperty(), Color.WHITE));
            KeyFrame frame4 = new KeyFrame(Duration.seconds(10),
                                           new KeyValue(ch.strokeProperty(), Color.YELLOW),
                                           new KeyValue(ch.fillProperty(), Color.WHITE));
            KeyFrame frame5 = new KeyFrame(Duration.seconds(12),
                                           new KeyValue(ch.strokeProperty(), Color.YELLOW),
                                           new KeyValue(ch.fillProperty(), TRANSPARENT));
            KeyFrame frame6 = new KeyFrame(Duration.seconds(15),
                                           new KeyValue(ch.strokeProperty(), TRANSPARENT),
                                           new KeyValue(ch.fillProperty(), TRANSPARENT));

            timeline.getKeyFrames().addAll(frame0, frame1, frame2, frame3, frame4, frame5, frame6);
        }

        timeline.setCycleCount(Timeline.INDEFINITE);
        timeline.play();
    }
文字が輝いているように見えるのはドロップシャドウを施しているからです。DropShadow ではなく、Bloom でも輝いているようなエフェクトをつけられるはずなのですが、いまいち。ですので、いろいろと調整のきく DropShadow にしてあります。
ソースは近いうちに GitHub に上げようと思います。 GitHub に上げました。JavaFXChristmasCardです。
というわけで、Merry Christmas!!
いろふさん絵描き歌 by JavaFX その 2
このエントリーは JavaFX Advent Calendar の 22 日目のエントリーです。
昨日は @tomo_taka01 さんの JavaFXでLambdaを使ってみる(ProgressBar) です。
明日は @fukai_yas さんです。
ちなみに、このエントリーも いろふ Advent Calendar ではありません。あしからず。
なぜ、その 2 なのかというと、前回の いろふさん絵描き歌 by JavaFX は悔いが残っているからです。というのも、絵描き歌なのに動きがない!
JavaFX といえばアニメーションというはずなのに、そのアニメーションがまったくないなんて、許せないわけです!!!
というわけで、動きをつけてみました。
たとえば、直線のアニメーションは Line で作っています。アニメーション開始時は Line の endX, endY プロパティを starX, startY プロパティと同じにしておきます。そして、最後に目的となる座標に設定しています。
円を描く場合は、Circle ではなく Arc を使っています。ようするに Arc の length を 0 から 360 にアニメーションで変更しているわけです。これで円や半円を書くことができます。
もちろん、これらのアニメーションは Transition ではできないので、すべて Timeline を使っています。
たとえば、はじめの枠線を描く部分は次のようになります (実際のコードではなく、抜粋でも動くように書き直してあります)。
        Line topBorder = new Line(0.0, 0.0, 0.0, 0.0);
        topBorder.setStrokeWidth(5.0);
        container.getChildren().add(topBorder);

        new Timeline(
            new KeyFrame(Duration.ZERO, new KeyValue(topBorder.endXProperty(), 0.0)),
            new KeyFrame(new Duration(500), new KeyValue(topBorder.endXProperty(), 300.0))
        ).play();
はじめの枠線は x 軸方向にしか移動しないので、endX だけを動かしています。
ただし、一番始めに線などをすべてコンテナに登録してしまうと、点だけが表示されてしまいます。そこで、一つ前のアニメーションが終わる時に、次にアニメーションする要素をコンテナに追加する処理を書いています。
たとえば、topBorder の後に rightBorder をアニメションさせるとすると、上の Timeline の部分が下のようになります。
        Line topBorder = new Line(0.0, 0.0, 0.0, 0.0);
        topBorder.setStrokeWidth(5.0);
        container.getChildren().add(topBorder);

        new Timeline(
            new KeyFrame(Duration.ZERO, new KeyValue(topBorder.endXProperty(), 0.0)),
                new KeyFrame(new Duration(500), new EventHandler<ActionEvent>() {
                        @Override
                        public void handle(ActionEvent t) {
                            container.getChildren().add(rightBorder);
                        }
                    },
                    new KeyValue(topBorder.endXProperty(), 300.0))
        ).play();
KeyFrame では、その時間に達した時に行なう処理を EventHandler で書くことができるので、そこでコンテナに追加する処理を記述しています。
さて、今回、一番苦労したのが、吹き出しの部分。特に吹き出しのベジェ曲線で描いている部分です。
1 つ目のベジェはいいのですが、次のベジェが困ってしまうわけです。なぜかというと、単に終点を移動させているだけだと、1 つ目のベジェにくっついてしまうわけです。
終点と始点を結んだ線を赤で描いてみると、前のベジェに沿うようになってしまっていることが分かります。ここを終点が移動してしまうので、下の図のように P を逆さまにしたように感じになってしまいます。
でも、本来やりたいことは下の図の赤線のところを辿っていくようにしたいわけです。
こういう曲線をアニメーションで描くには PathTransition があります。ところが PathTransition はアニメーションさせるノード全体がパス上で移動してしまいます。
ここでやりたいのはノード全体を動かすのではなく、ベジェ曲線の終点だけを動かしたいのです。
そこで、考えたのが、見えない丸をベジェ曲線の上を移動させて、その中心点と移動量を足し合わせたものに、終点をバインドさせるということ。
        final CubicCurve curve2 = new CubicCurve(129, 141, 90, 135, 66, 120, 129, 141);
        curve2.setFill(null);
        curve2.setStroke(Color.BLACK);
        curve2.setStrokeWidth(10.0);
        curve2.setStrokeLineCap(StrokeLineCap.ROUND);

        final CubicCurve drawPath = new CubicCurve(129, 141, 90, 135, 66, 120, 81, 90);
        final Circle circle = new Circle(129, 141, 1);

        // 円の中心と移動量を足したものをベジェ曲線の終点とバインドさせる
        curve2.endXProperty().bind(Bindings.add(circle.centerXProperty(),
                                               circle.translateXProperty()));
        curve2.endYProperty().bind(Bindings.add(circle.centerYProperty(),
                                               circle.translateYProperty()));

        // 円を動かす
        PathTransition transition = new PathTransition(new Duration(500), drawPath);
transition.setNode(circle);すると、円が動くとベジェ曲線の終点がそれに応じてちゃんと曲線上を移動していくわけです。上の図がそうですね。
ただし、ベジェ曲線の制御点を最終的なポイントにしてしまうとアニメーション中に曲線が大きく曲がってしまうことがあります。そこで、制御点もアニメーションと一緒に移動させています。
ただ、この制御点のアニメーションはいまいちで、アニメーションの終わりに急にベジェ曲線が膨らむようなアニメーションになってしまっています ^ ^;;
下に表示されている歌詞は ゆきーんさんの歌 そのままです。ゆきーんさん (id:lpczclt)、無断で使ってしまってスイマセン。
歌があればもっといいのですが...
id:taizy さんの JavaFX Media playerのちょっと面白い機能 で紹介されたように MediaPlayer でタイマーでイベントを起こすことができ、これを使えば適当な歌詞のところでアニメーションが始めるようなこともできたはずです。
でも、おべんとうばこのうたはメロディがないんですよね (ラップか?)。フリーの MIDI がないかどうか探してみたのですが、メロディがないので MIDI を作りにくいらしく見つけられませんでした。だれか作ってくれれば、それに合わせてアニメーションするように改造します!!
ということで、できたのはこちらです。
ソースは gist においてあります。
https://gist.github.com/49b71f2371570be55cd5
gist 記法がなぜか動かないので、URL です。スイマセン。
